

· How To and Tutorials
· Life Hacks and Reviews
· Way Off Base
· MajorGeeks Deals
· News
· Off Base
· Reviews
· Life Hacks and Reviews
· Way Off Base
· MajorGeeks Deals
· News
· Off Base
· Reviews

· YouTube
· Facebook
· Instagram
· Twitter
· Pintrest
· RSS/XML Feeds
· News Blur
· Yahoo
· Symbaloo
· Pintrest
· RSS/XML Feeds
· News Blur
· Yahoo
· Symbaloo
· Top Freeware Picks
· Malware Removal
· Geektionary
· Useful Links
· About Us
· Copyright
· Privacy
· Terms of Service
· How to Uninstall
· Malware Removal
· Geektionary
· Useful Links
· About Us
· Copyright
· Privacy
· Terms of Service
· How to Uninstall


· View Essential System Details with myResources
· Control When Windows 10 Updates with Kill-Update
· How to Fix There Was a Problem Resetting Your PC Error on Windows 10
· How to Turn on or off Recommended Troubleshooting in Windows 10
· MajorGeeks Deals Page
· test jim
· How to Set a New Home / Start Page In Edge
· How To Remove the Bing Discover Button on Microsoft Edge for Windows, Mac and Linux
· How to Block Spam Calls on a Samsung Phone
· How to Change DPI Scaling Settings in Windows 10 or 11
· How to Install Threads on Your Windows Desktop
· MajorGeeks and Cheat Happens August 2023 Give-A-Way
· Here's What You Need to Know About LogoFAIL
· Using AeroShake To Clear Your Desktop
· How to Edit Audio in Your Videos Using Shotcut
· How to Diagnose RAM Issues with Windows Memory Diagnostic Tool: A Step-by-Step Guide
· Deciding Between Idle State, Sleep Mode, and Shutdown: What's Best for Your PC?
· Unlock Google's Hidden Powers: Search Tricks Every Geek Should Know
· 2024 Black Friday Deals
· TikTok Ban: What Happens If the Supreme Court Upholds It?
How to Clean Install Windows 11
Installing a clean copy of Windows 11 allows you to have a fresh install of Windows. Installing Windows has never been simple for many, but we're going to walk you through it. Whether you need help from beginning to end or just a couple of steps, we've got you covered.
If you're having problems with your current installation and want to keep your files, you might consider How to Reset or Reinstall Windows 10 & 11 Using the Cloud.
Video tutorial:
1: Download and Burn a Windows 11 ISO
The first thing you need is a Windows 11 ISO and then create a bootable thumb drive. The easiest way to do this is to use Microsoft Media Creation Tool. The app is free, portable, and easy to use for any skill level. The download page also has a video tutorial if you need it.
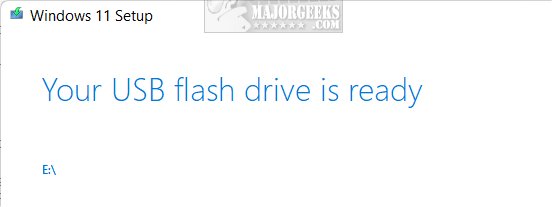
Download the Media Creation Tool. Insert a thumb drive that has at least 8GB of space. Run the Media Creation Tool. Select Create Installation media, then click on USB flash drive. The process will delete all of the files on the thumb drive.
This step could take an hour due to the large file size. You don't need to be present for most of it, and you can continue using your computer. Click Finish when prompted and wait a few seconds for the clean-up to complete.
2: Boot From the Flash Drive
Leave your flash drive inserted once the above steps are complete, and reboot.
If your computer doesn't boot from the flash drive, you need to enable it in your BIOS. Look up your computer manufacturer or motherboard for directions on getting into the BIOS and making sure the flash drive can boot. Modern (UEFI) computers should see the flash drive and boot automatically.
Watch for the press a key prompt, or Windows will try to boot from your hard drive after about ten seconds.
3: Getting Everything Ready
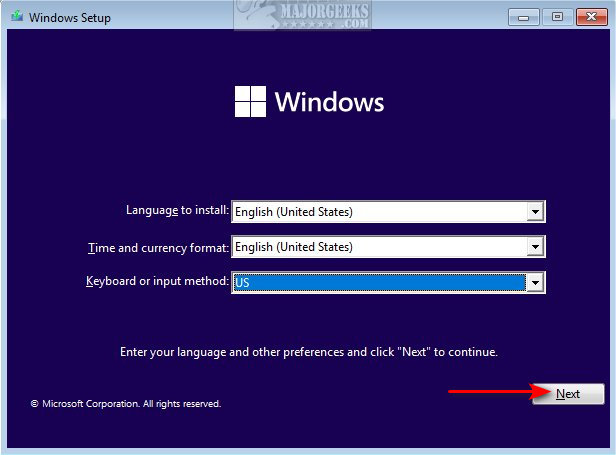
Select your language, time, and keyboard method if needed. Click Next.
Click on Install now.
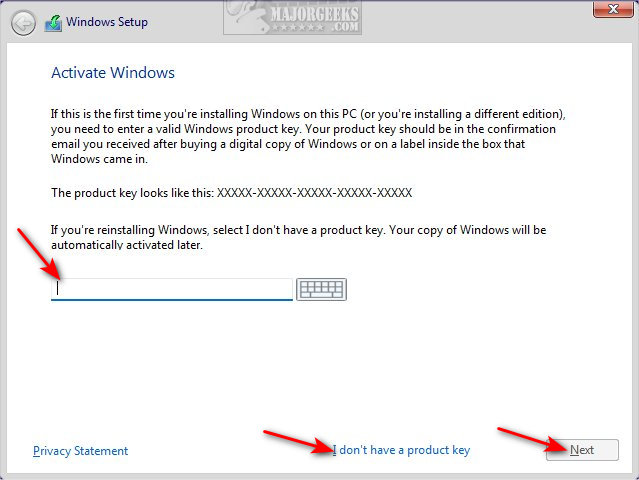
Enter your product key, or click on I don't have a product key to enter it later. Most newer computers have the key stored in your BIOS if you don't have a product key. In this scenario, Windows will activate after installation. Otherwise, your product key might be on a sticker on your computer, or if purchased digitally, you hopefully wrote it down or backed it up somewhere.
Click Next.
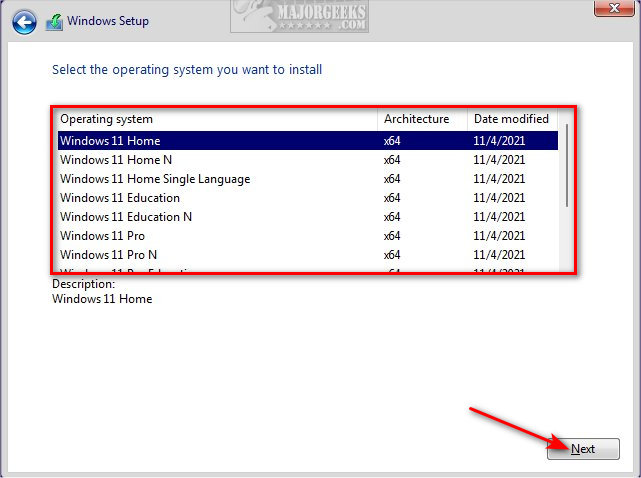
Choose what operating system you want to install. The most common operating system for home users is, you guessed it, Windows 10 or 11 Home. Click Next.
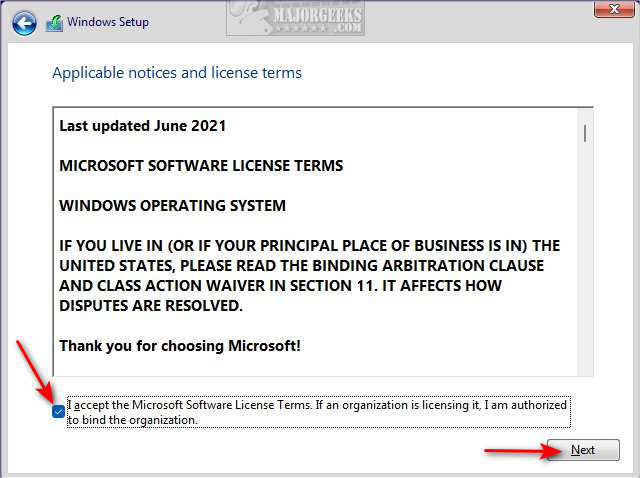
Check the box and click Next to accept the Microsoft License Terms.
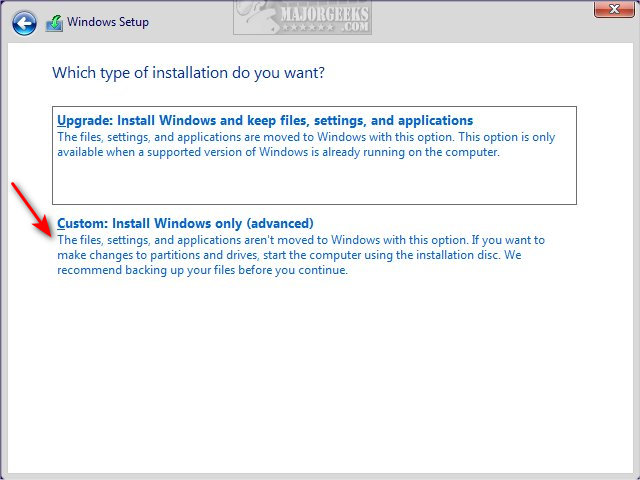
On the next screen, click on Custom: Install Windows only (advanced).
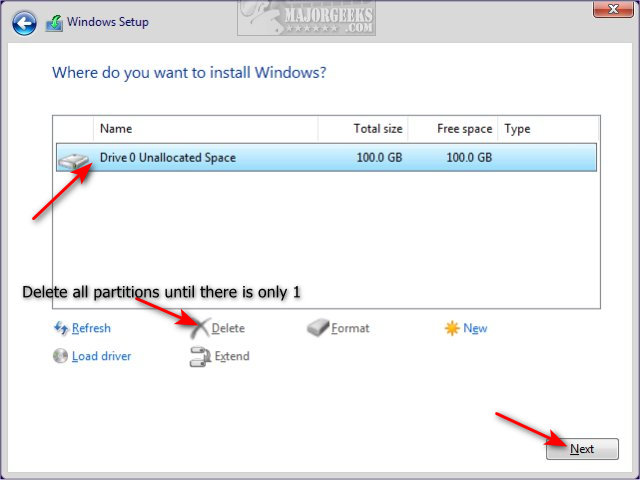
Windows has hidden operating system partitions. In the next step, you want to delete all the partitions until you see only one partition named Unallocated Space or Primary. Click on the one partition left, and click Next. Windows will create the required partitions for you next.
4: Install Windows 11
Windows will now begin installing Windows 11.
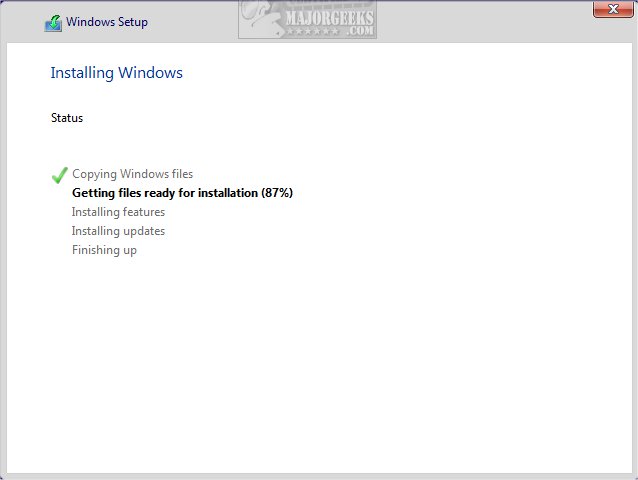
Installing Windows can take some time (5-30 minutes) to download updates, etc., so if you need a break, you can walk away now. Your computer might restart a couple of times, so remove the thumb drive on the first restart.
5: Final Steps
Now that Windows 11 is installed, you need to verify a few settings. Follow the prompts.
Verify your Country and keyboard layout. Next, you can add a second keyboard layout or skip this step.
Windows 11 will check for updates.
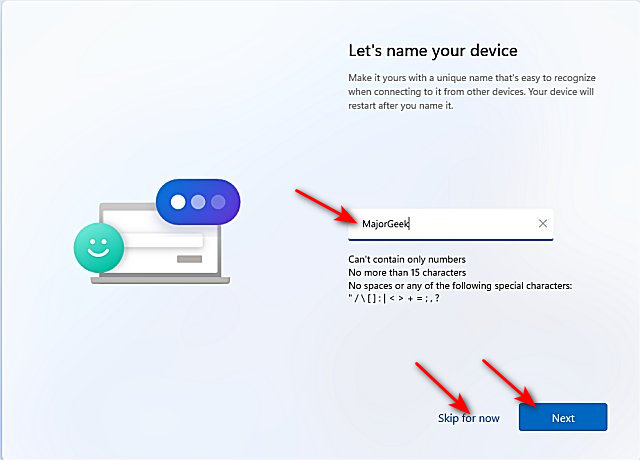
Choose a name for your computer. Most people will use their first name, but you can use anything you like, up to 15 characters without spaces. You can also skip this step.
Windows 11 should reboot for the last time and ask you to sign in to your Microsoft account.
Create a PIN.
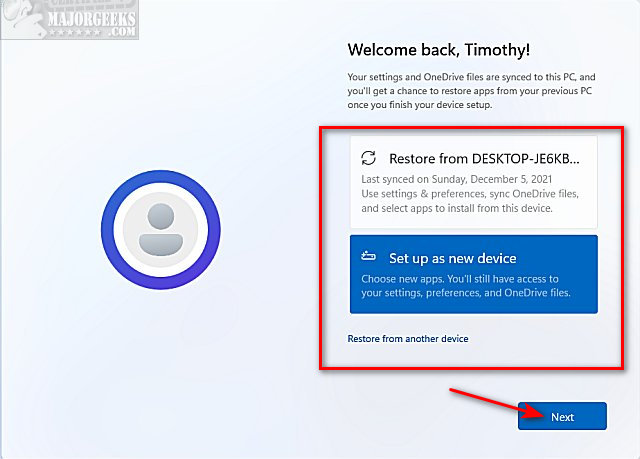
In the next step, you can set up your computer as a new device or restore from a saved point synced to your Microsoft account. You can also choose a saved sync location or a different computer by clicking on Restore from another device.
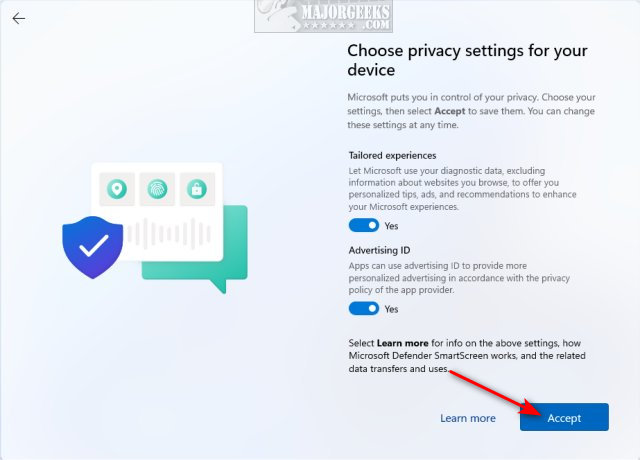
If you choose to set up a new computer, there are some additional steps next, including Privacy settings. You can take your time and choose the next settings to suit your needs, or you can change these settings later. There are usually three pages of privacy settings to choose from.
Click Accept after you make your choices.
In the next step, you can let Windows 11 know how you plan to use your device. We often skip this step because it does nothing to the Windows installation except for recommendations, ads, and personalized tips.
You can back up your files to OneDrive, or click Only save files to this PC.
Windows will now (finally) finalize the installation of Windows 11 using all of the settings you selected up to this point. Windows will ask you to wait will the installation wraps up, which only takes a few minutes on average.
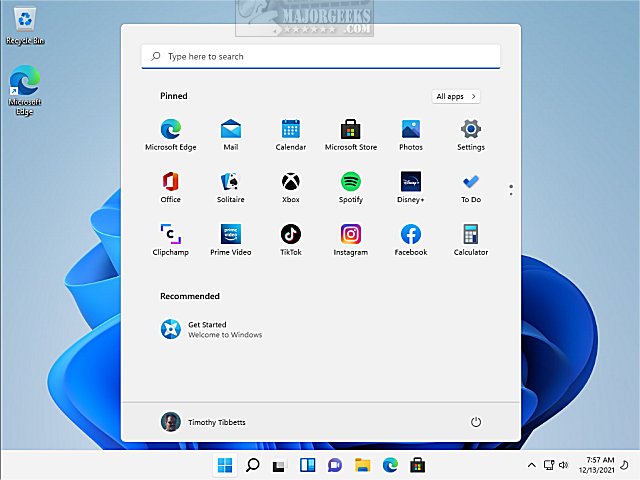
Congratulations! Your clean install of Windows 11 is ready to use.
comments powered by Disqus
If you're having problems with your current installation and want to keep your files, you might consider How to Reset or Reinstall Windows 10 & 11 Using the Cloud.
1: Download and Burn a Windows 11 ISO
The first thing you need is a Windows 11 ISO and then create a bootable thumb drive. The easiest way to do this is to use Microsoft Media Creation Tool. The app is free, portable, and easy to use for any skill level. The download page also has a video tutorial if you need it.
Download the Media Creation Tool. Insert a thumb drive that has at least 8GB of space. Run the Media Creation Tool. Select Create Installation media, then click on USB flash drive. The process will delete all of the files on the thumb drive.
This step could take an hour due to the large file size. You don't need to be present for most of it, and you can continue using your computer. Click Finish when prompted and wait a few seconds for the clean-up to complete.
2: Boot From the Flash Drive
Leave your flash drive inserted once the above steps are complete, and reboot.
If your computer doesn't boot from the flash drive, you need to enable it in your BIOS. Look up your computer manufacturer or motherboard for directions on getting into the BIOS and making sure the flash drive can boot. Modern (UEFI) computers should see the flash drive and boot automatically.
Watch for the press a key prompt, or Windows will try to boot from your hard drive after about ten seconds.
3: Getting Everything Ready
Select your language, time, and keyboard method if needed. Click Next.
Click on Install now.
Enter your product key, or click on I don't have a product key to enter it later. Most newer computers have the key stored in your BIOS if you don't have a product key. In this scenario, Windows will activate after installation. Otherwise, your product key might be on a sticker on your computer, or if purchased digitally, you hopefully wrote it down or backed it up somewhere.
Click Next.
Choose what operating system you want to install. The most common operating system for home users is, you guessed it, Windows 10 or 11 Home. Click Next.
Check the box and click Next to accept the Microsoft License Terms.
On the next screen, click on Custom: Install Windows only (advanced).
Windows has hidden operating system partitions. In the next step, you want to delete all the partitions until you see only one partition named Unallocated Space or Primary. Click on the one partition left, and click Next. Windows will create the required partitions for you next.
4: Install Windows 11
Windows will now begin installing Windows 11.
Installing Windows can take some time (5-30 minutes) to download updates, etc., so if you need a break, you can walk away now. Your computer might restart a couple of times, so remove the thumb drive on the first restart.
5: Final Steps
Now that Windows 11 is installed, you need to verify a few settings. Follow the prompts.
Verify your Country and keyboard layout. Next, you can add a second keyboard layout or skip this step.
Windows 11 will check for updates.
Choose a name for your computer. Most people will use their first name, but you can use anything you like, up to 15 characters without spaces. You can also skip this step.
Windows 11 should reboot for the last time and ask you to sign in to your Microsoft account.
Create a PIN.
In the next step, you can set up your computer as a new device or restore from a saved point synced to your Microsoft account. You can also choose a saved sync location or a different computer by clicking on Restore from another device.
If you choose to set up a new computer, there are some additional steps next, including Privacy settings. You can take your time and choose the next settings to suit your needs, or you can change these settings later. There are usually three pages of privacy settings to choose from.
Click Accept after you make your choices.
In the next step, you can let Windows 11 know how you plan to use your device. We often skip this step because it does nothing to the Windows installation except for recommendations, ads, and personalized tips.
You can back up your files to OneDrive, or click Only save files to this PC.
Windows will now (finally) finalize the installation of Windows 11 using all of the settings you selected up to this point. Windows will ask you to wait will the installation wraps up, which only takes a few minutes on average.
Congratulations! Your clean install of Windows 11 is ready to use.
comments powered by Disqus
