


How to Create Self-Extracting Archives on Windows 10 & 11
By Timothy Tibbettson 06/15/2023 |
Many of us have created a compressed archive over the year, but did you know you can create a self-extracting or self-installing package with IExpress built into Windows? Here's how.
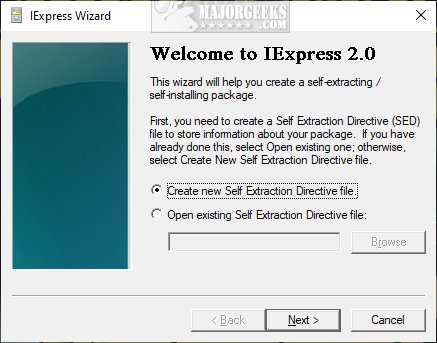
Press the Windows Key + R. Type in iexpress, and press Enter.
Check the box next to Create a new Self-Extraction Directive file if not already checked, and click Next.
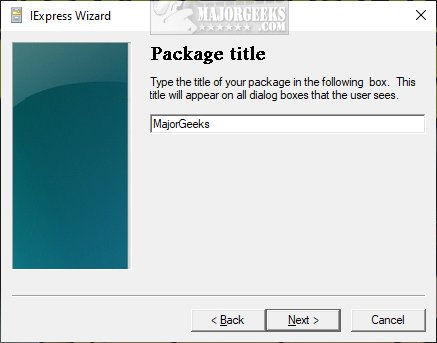
Enter a name for your archive and click Next.
Choose whether to Prompt or No prompt and click Next. Most people will use No prompt (default).
Choose whether to Display a license or Do not display a license and click Next.
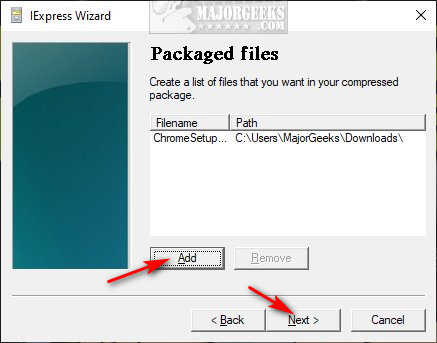
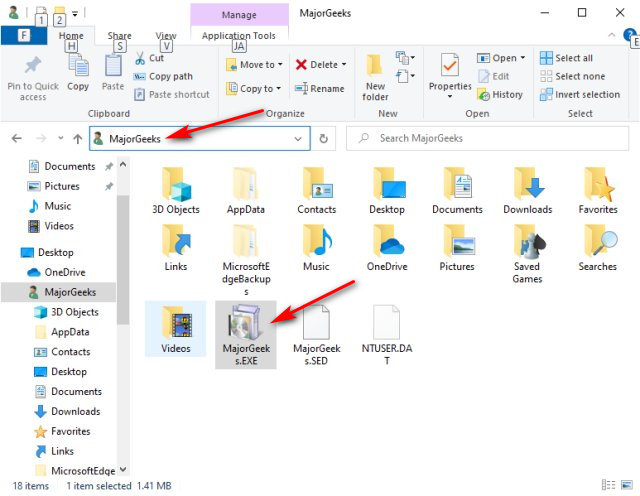
Click on Add, and File Explorer will open to add files to your self-extracting archive. You can use Ctrl + A to select all files in a folder.
Click on Next.
You can now add programs or INF files and post-install commands and click Next.
On the next screen, you can choose how to show the install window - Default, Hidden, Minimized, or Maximized, and click Next.
Next, you can add a message to show the user after installation is completed and click Next.
Finally, name your package and decide if you want the user to restart after installation.
Click Next a couple more times to create your package.
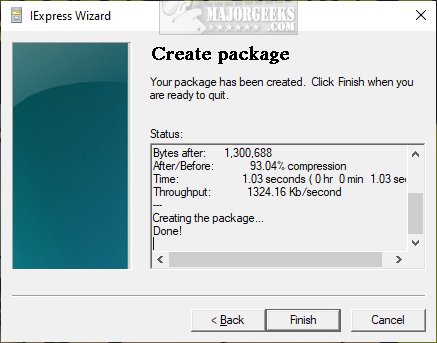
Your new package can be found (by default) in your User folder (C:\Users\UserName).
Similar:
Extract, Expand or Create CAB Files With the Command-Line
How to Add Extract All Context Menu for ZIP Files
How to Open and Use a Cab File in Windows
What Is a RAR File and How to Open Them
What is LZMA Compression?
Press the Windows Key + R. Type in iexpress, and press Enter.
Check the box next to Create a new Self-Extraction Directive file if not already checked, and click Next.
Enter a name for your archive and click Next.
Choose whether to Prompt or No prompt and click Next. Most people will use No prompt (default).
Choose whether to Display a license or Do not display a license and click Next.
Click on Add, and File Explorer will open to add files to your self-extracting archive. You can use Ctrl + A to select all files in a folder.
Click on Next.
You can now add programs or INF files and post-install commands and click Next.
On the next screen, you can choose how to show the install window - Default, Hidden, Minimized, or Maximized, and click Next.
Next, you can add a message to show the user after installation is completed and click Next.
Finally, name your package and decide if you want the user to restart after installation.
Click Next a couple more times to create your package.
Your new package can be found (by default) in your User folder (C:\Users\UserName).
Similar:
