


Critical Process Died Error
By Timothy Tibbettson 07/18/2023 |
In this article, we're going to look at possible solutions to the Blue Screen (BSOD) error Critical Process Died. You might also receive an error code 0x000000EF. We're not going to lie, this is one difficult error to troubleshoot but here are the steps we think might help.
Because there are many possible solutions, knowing what was happening when the error occurred will allow you to skip some of the following steps. Common examples include new Windows Updates, drivers, hardware changes, new software installs, or updates.
1: Steps That Don't Require Safe Mode
Let's first spend a few minutes eliminating problems that don't require Safe Mode or Windows Recovery,
Unplug all external media you don't need to be plugged in. We're often looking at USB devices, including smartphones, flash drives, etc.
Check if your fans are running and if your computer is dusty or dirty. Heat issues can cause blue screens errors. You can buy air dusters at most computer shops, drug stores, and office supply stores.
Check for a BIOS update. BIOS problems often accompany clean installs of Windows 10. Every computer is different, so that you might need to Google your computer or motherboard name and model. See if there is a BIOS update and whether you can update from within the BIOS or if you need to be in Windows or the Command Prompt.
You could also consider resetting your BIOS to optimal or factory defaults.
2: Booting into Safe Mode or Windows Recovery
Quite a few guides out there overlook that you will need to boot into Safe Mode or the Windows Recovery Environment (WinRE) to execute possible fixes. It's also important to note that Microsoft blames many blue screen errors on drivers, external hardware, and third-party antivirus software.
If you can't get to Windows at all, we have a few options. You could boot from your Windows DVD if you have one, or if you have access to another computer, download Windows 10 Media Creation Tool and create a Windows 10 DVD. Everyone should have a copy of Windows on DVD for cases just like this.
If not, you might have to reboot Windows a few times before it recognizes you need help. Hold the power button down for 10 seconds until your computer is off. Now, press the power button, and after the BIOS splash screen, hold the power button down for 10 seconds again. Repeat these steps until the Windows Recovery Environment appears.
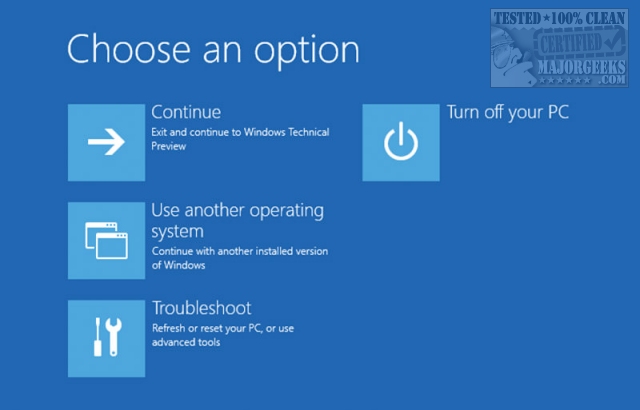
Click on Troubleshoot > Advanced Options to proceed. Depending on the steps below, you'll want to pick from one of these options:
System Restore can Restore your PC to the point before your problem started.
Uninstall Updates is a good choice if your problem started immediately after a Windows Update.
System Image Recovery can recover your computer, assuming you backed it up using this method.
Startup Repair might be useful with third-party app problems.
Command Prompt helpful for running check disk.
UEFI Firmware Settings is for advanced users and not used in this guide.
See more recovery options This is where you can boot into Safe Mode.
3: Software Issues
If you recently Windows Updates, we want to consider uninstalling or checking for another Windows Update. We see botched Windows Updates all the time, and fixes are often rolled out within days. While running Windows Updates to fix a broken Update might seem odd, it's not.
In Step 5, we look at updated driver problems from Windows Updates. If you suspect Windows Updates is the cause, jump to Step 5 but also check your Quality Updates as well as Driver Updates.
If you installed or updated software recently, you may need to uninstall them or run the Program Compatibility mentioned in the next step.
Don't forget about Antivirus. Much like any software, if you recently updated or installed a new antivirus, uninstall it now. Windows Defender will take over and is more than capable.
4: Run Troubleshooters
As we've mentioned many times, the Microsoft Troubleshooter now looks for known problems and offers solutions. Blue Screen errors are nothing new, and the troubleshooters might help. To get to the Troubleshooters, go to Settings > Updates & Security > Troubleshoot.
Our first choice would be the now hidden Hardware and Devices Troubleshooter. The executable for the Hardware and Devices Troubleshooter is called msdt.exe and can be found in C:\Windows\System32.
As mentioned earlier, other troubleshooters might help if you know what you were doing when the error started. Consider Windows Updates, Power, and Program Compatibility.
5: Driver Problems
Did you, or Windows Updates recently install new drivers? If, so roll them back. If not, update your drivers.
Click Start > Settings > Update & Security > Windows Updates. Click on View update history on the right.
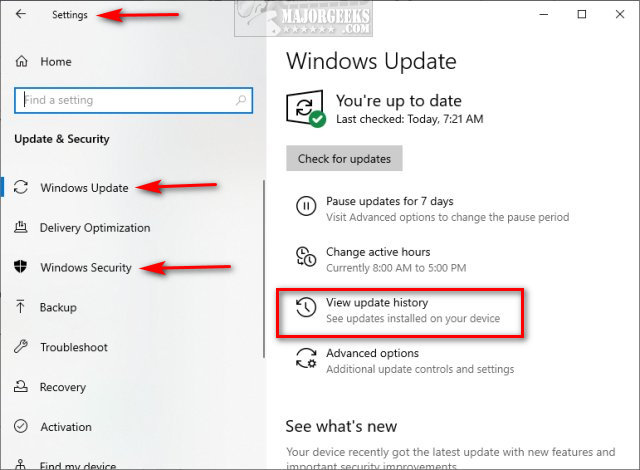
Scroll down to Driver Updates and click on the arrow to expand the list.

If you see a driver that was updated about when the BSOD occurred, press the Windows Key + R, type in devmgmt.msc, and press Enter. Double-click the device that had a recent driver update, click on the Driver tab, then click on Roll Back Driver.
Next, you'll want to update your drivers. You can use a third-party app, or download drivers individually. If you need more help downloading drivers, see How to Download the Latest Drivers for Windows.
6: DISM and System File Checker
Windows 10, Windows 8.1, or Windows 8 users will need to first run the Deployment Image Servicing and Management (DISM) tool before running the System File Checker. DISM will use Windows Update to provide any files that are needed to fix corruption. If you skip this step, System File Checker might not work. Windows 7 and Vista users can skip this step.
You will need to first open the Command Prompt or PowerShell as administrator.
Type in DISM.exe /Online /Cleanup-image /Restorehealth and press enter. This may take a few minutes.
All you need to do is type in sfc /scannow and press the Enter key.
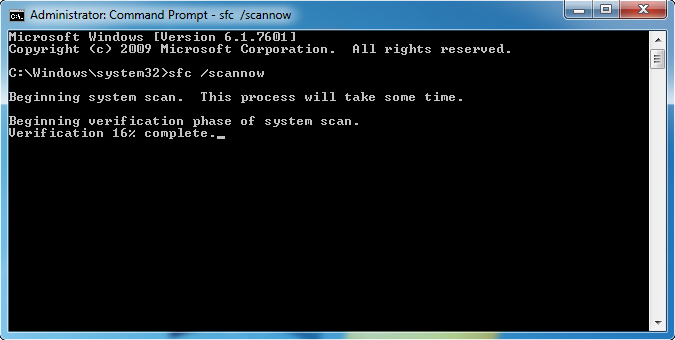
System File Checker will now scan for and replace files from the Windows cache, typically located at C:\Windows\System32\dllcache.
Once completed, you should see one of four possible results:
Windows Resource Protection did not find any integrity violations - You should be good to go as no issues were found.
Windows Resource Protection could not perform the requested operation - Run SFC from safe mode and also verify PendingDeletes, and PendingRenames folders exist under C:\WinSxS\Temp
Windows Resource Protection found corrupt files and successfully repaired them - Problems were found and fixed. Microsoft has a page here to show you how to view details.
Windows Resource Protection found corrupt files but was unable to fix some of them - Odds are the file couldn't be replaced, and you'll need to do so manually. Scroll back up to see how to view the log file to locate the file in question.
7: Reset This PC
When all else fails, try System restore or Reset This PC.
Open Start > Control Panel > Update & Security. On the left, click on Recovery. Click on Get started under Reset this PC.
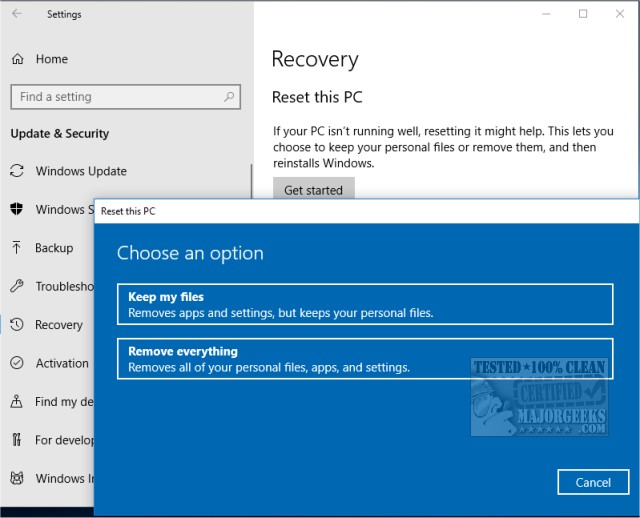
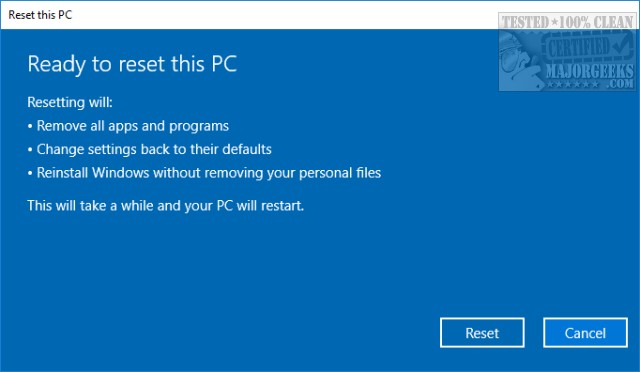
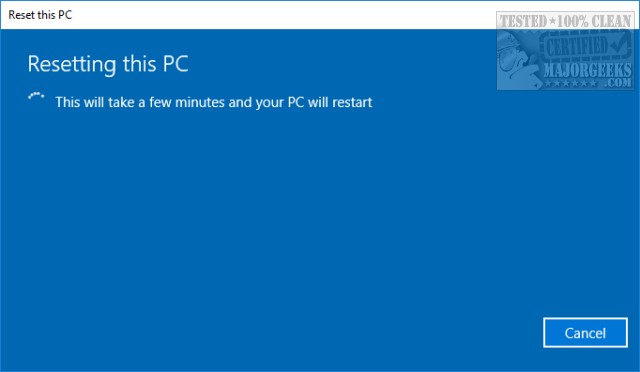
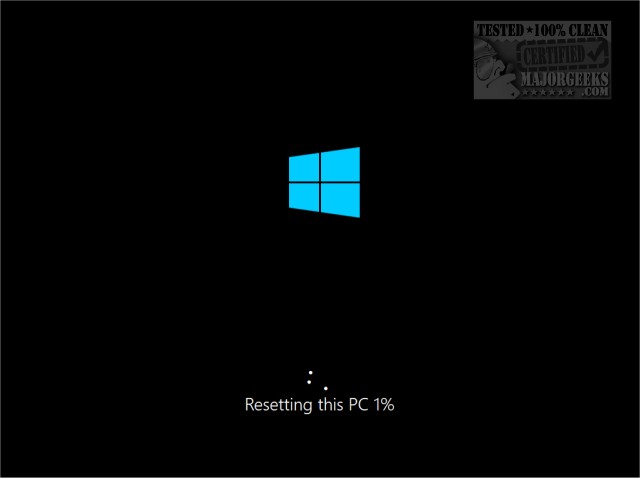
In the next screen, you'll be notified of what programs will need to be reinstalled, followed by another screen that summarizes everything we've discussed so far. Press Reset to begin. Expect to walk away while your computer is restarted and reset. Our computer, with only a dozen apps and an SSD hard drive, took 19 minutes. The following screenshots show you what you can expect to see:
That's it. You can now begin replacing your apps and customizing Windows 10 the way you want.
Did we miss anything? Let us know in the comments below.
Because there are many possible solutions, knowing what was happening when the error occurred will allow you to skip some of the following steps. Common examples include new Windows Updates, drivers, hardware changes, new software installs, or updates.
1: Steps That Don't Require Safe Mode
Let's first spend a few minutes eliminating problems that don't require Safe Mode or Windows Recovery,
Unplug all external media you don't need to be plugged in. We're often looking at USB devices, including smartphones, flash drives, etc.
Check if your fans are running and if your computer is dusty or dirty. Heat issues can cause blue screens errors. You can buy air dusters at most computer shops, drug stores, and office supply stores.
Check for a BIOS update. BIOS problems often accompany clean installs of Windows 10. Every computer is different, so that you might need to Google your computer or motherboard name and model. See if there is a BIOS update and whether you can update from within the BIOS or if you need to be in Windows or the Command Prompt.
You could also consider resetting your BIOS to optimal or factory defaults.
2: Booting into Safe Mode or Windows Recovery
Quite a few guides out there overlook that you will need to boot into Safe Mode or the Windows Recovery Environment (WinRE) to execute possible fixes. It's also important to note that Microsoft blames many blue screen errors on drivers, external hardware, and third-party antivirus software.
If you can't get to Windows at all, we have a few options. You could boot from your Windows DVD if you have one, or if you have access to another computer, download Windows 10 Media Creation Tool and create a Windows 10 DVD. Everyone should have a copy of Windows on DVD for cases just like this.
If not, you might have to reboot Windows a few times before it recognizes you need help. Hold the power button down for 10 seconds until your computer is off. Now, press the power button, and after the BIOS splash screen, hold the power button down for 10 seconds again. Repeat these steps until the Windows Recovery Environment appears.
Click on Troubleshoot > Advanced Options to proceed. Depending on the steps below, you'll want to pick from one of these options:
System Restore can Restore your PC to the point before your problem started.
Uninstall Updates is a good choice if your problem started immediately after a Windows Update.
System Image Recovery can recover your computer, assuming you backed it up using this method.
Startup Repair might be useful with third-party app problems.
Command Prompt helpful for running check disk.
UEFI Firmware Settings is for advanced users and not used in this guide.
See more recovery options This is where you can boot into Safe Mode.
3: Software Issues
If you recently Windows Updates, we want to consider uninstalling or checking for another Windows Update. We see botched Windows Updates all the time, and fixes are often rolled out within days. While running Windows Updates to fix a broken Update might seem odd, it's not.
In Step 5, we look at updated driver problems from Windows Updates. If you suspect Windows Updates is the cause, jump to Step 5 but also check your Quality Updates as well as Driver Updates.
If you installed or updated software recently, you may need to uninstall them or run the Program Compatibility mentioned in the next step.
Don't forget about Antivirus. Much like any software, if you recently updated or installed a new antivirus, uninstall it now. Windows Defender will take over and is more than capable.
4: Run Troubleshooters
As we've mentioned many times, the Microsoft Troubleshooter now looks for known problems and offers solutions. Blue Screen errors are nothing new, and the troubleshooters might help. To get to the Troubleshooters, go to Settings > Updates & Security > Troubleshoot.
Our first choice would be the now hidden Hardware and Devices Troubleshooter. The executable for the Hardware and Devices Troubleshooter is called msdt.exe and can be found in C:\Windows\System32.
As mentioned earlier, other troubleshooters might help if you know what you were doing when the error started. Consider Windows Updates, Power, and Program Compatibility.
5: Driver Problems
Did you, or Windows Updates recently install new drivers? If, so roll them back. If not, update your drivers.
Click Start > Settings > Update & Security > Windows Updates. Click on View update history on the right.
Scroll down to Driver Updates and click on the arrow to expand the list.
If you see a driver that was updated about when the BSOD occurred, press the Windows Key + R, type in devmgmt.msc, and press Enter. Double-click the device that had a recent driver update, click on the Driver tab, then click on Roll Back Driver.
Next, you'll want to update your drivers. You can use a third-party app, or download drivers individually. If you need more help downloading drivers, see How to Download the Latest Drivers for Windows.
6: DISM and System File Checker
Windows 10, Windows 8.1, or Windows 8 users will need to first run the Deployment Image Servicing and Management (DISM) tool before running the System File Checker. DISM will use Windows Update to provide any files that are needed to fix corruption. If you skip this step, System File Checker might not work. Windows 7 and Vista users can skip this step.
You will need to first open the Command Prompt or PowerShell as administrator.
Type in DISM.exe /Online /Cleanup-image /Restorehealth and press enter. This may take a few minutes.
All you need to do is type in sfc /scannow and press the Enter key.
System File Checker will now scan for and replace files from the Windows cache, typically located at C:\Windows\System32\dllcache.
Once completed, you should see one of four possible results:
7: Reset This PC
When all else fails, try System restore or Reset This PC.
Open Start > Control Panel > Update & Security. On the left, click on Recovery. Click on Get started under Reset this PC.
In the next screen, you'll be notified of what programs will need to be reinstalled, followed by another screen that summarizes everything we've discussed so far. Press Reset to begin. Expect to walk away while your computer is restarted and reset. Our computer, with only a dozen apps and an SSD hard drive, took 19 minutes. The following screenshots show you what you can expect to see:
That's it. You can now begin replacing your apps and customizing Windows 10 the way you want.
Did we miss anything? Let us know in the comments below.
