


How to Add Disk Management to Control Panel in Windows
By Timothy Tibbetts |
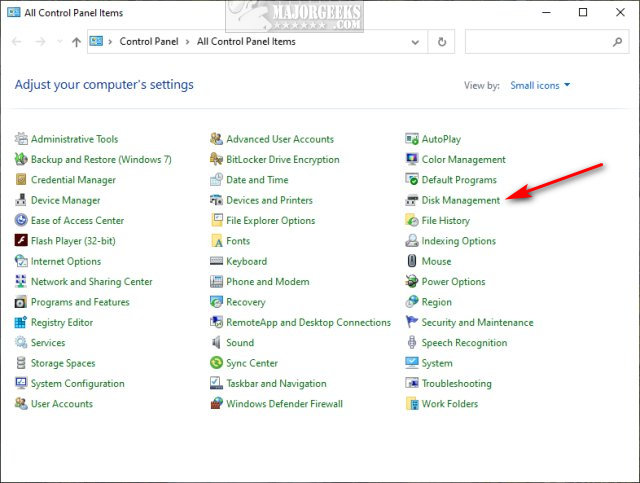
Windows 10 now uses Settings, but many people still prefer the Classic Control Panel. Old habits die hard, and that's OK. This tutorial shows you how to add Add Disk Management to the classic Control Panel in Windows 10, 8, and 7.
Video tutorial:
Download Add Disk Management to Control Panel in Windows and extract the two files.
Add Disk Management to Control Panel.reg
Remove Disk Management From Control Panel.reg (Default)
Double-click Add Disk Management to Control Panel.reg or Remove Disk Management From Control Panel.reg to add or remove Disk Management from the Control Panel in Windows.
Click Yes when prompted by User Account Control.
Click Yes when prompted by Registry Editor.
Click OK when prompted by the Registry Editor.
This tweak is included as part of MajorGeeks Registry Tweaks.
Similar:
How to Add the Control Panel to the Context Menu in Windows 10
Add All Tasks or God Mode to the Control Panel
How to Add System Configuration (Msconfig) to Control Panel
How to Add Settings to the Context Menu in Windows 10
How to Add Registry Editor to Control Panel in Windows
comments powered by Disqus
Download Add Disk Management to Control Panel in Windows and extract the two files.
Add Disk Management to Control Panel.reg
Remove Disk Management From Control Panel.reg (Default)
Double-click Add Disk Management to Control Panel.reg or Remove Disk Management From Control Panel.reg to add or remove Disk Management from the Control Panel in Windows.
Click Yes when prompted by User Account Control.
Click Yes when prompted by Registry Editor.
Click OK when prompted by the Registry Editor.
This tweak is included as part of MajorGeeks Registry Tweaks.
Similar:
comments powered by Disqus
