


How to Add or Remove PIN in Windows 10
By Timothy Tibbetts |
Windows 10 can use a Face, Fingerprint, Pin, Security Key, Picture Password, or a Microsoft Account to log into Windows 10. Here's how to add or remove "Sign in with a PIN."
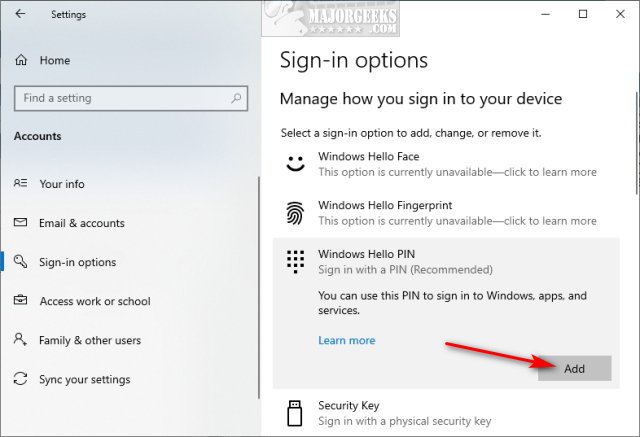
To add a PIN click on Start > Settings > Accounts > Sign-in Options.
Click on Add. Follow the prompts to log in to your Microsoft Account and set up your PIN.
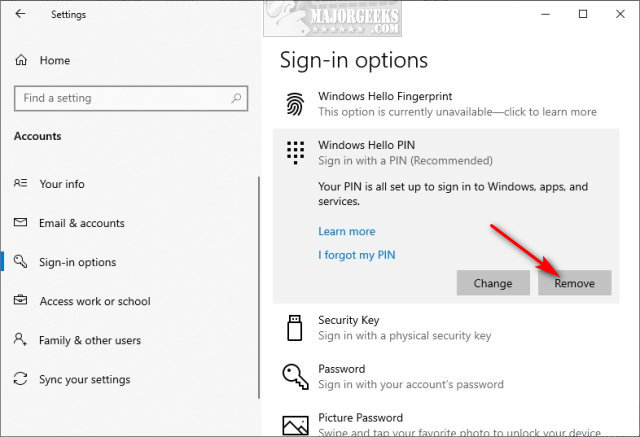
To Remove a PIN click on Start > Settings > Accounts > Sign-in Options.
Click on Remove.
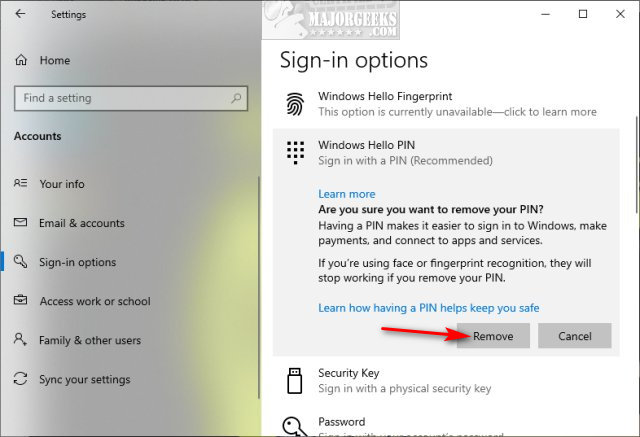
Click on Remove again.
Combine this tutorial with How to Disable the Windows 10 Login Screen, and you can boot into Windows 10 without prompts.
Similar:
How to Disable the Windows 10 Login Screen
How to Hide User Accounts from the Windows 10 Sign-In Screen
How to Change Your User And Account Names in Windows 10
How to Show or Hide Your Email Address on the Sign-In Screen
comments powered by Disqus
To add a PIN click on Start > Settings > Accounts > Sign-in Options.
Click on Add. Follow the prompts to log in to your Microsoft Account and set up your PIN.
To Remove a PIN click on Start > Settings > Accounts > Sign-in Options.
Click on Remove.
Click on Remove again.
Combine this tutorial with How to Disable the Windows 10 Login Screen, and you can boot into Windows 10 without prompts.
Similar:
How to Disable the Windows 10 Login Screen
How to Hide User Accounts from the Windows 10 Sign-In Screen
How to Change Your User And Account Names in Windows 10
How to Show or Hide Your Email Address on the Sign-In Screen
comments powered by Disqus
