


How to Change Windows Defender Scheduled Scan Type
By Timothy Tibbetts |
Windows Defender has come a long way to replace expensive, crippled, or even or PUP (Potentially Unwanted Programs) ridden antivirus programs, but like any other app, it's not perfect. For example, look at how much effort is required to install Avast without the bloat.
One option that we can change, but isn't readily available like most antivirus programs, is the ability to change from the default Quick Scan to a Full Scan.
We can accomplish this by opening PowerShell as an Administrator.
Find out your current default scan mode by typing in:
Get-MpPreference |Select-Object ScanParameters.
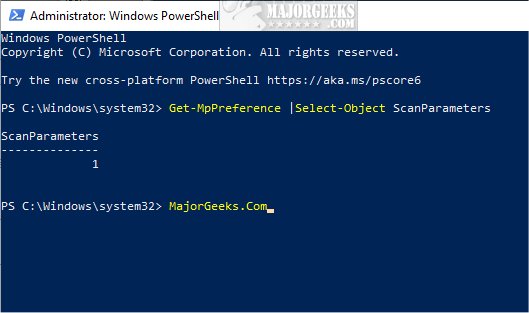
1: Quick Scan
2: Full Scan
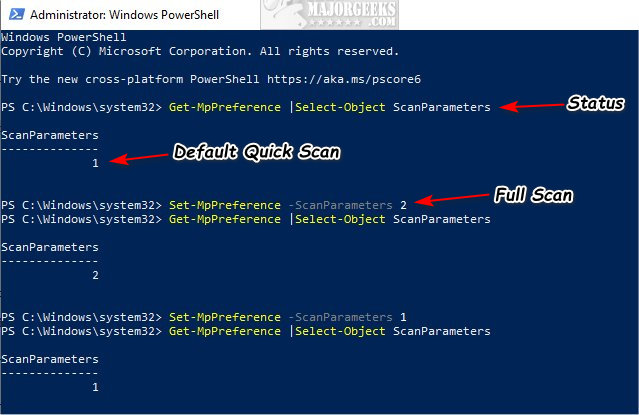
To change the default scan mode, type in Set-MpPreference -ScanParameters (1 or 2) using either 1 (Quick) or 2 (Full).
In the next screenshot, you can see all the steps mentioned above, in order.
PowerShell makes this easy enough for anyone to try.
Anyone who prefers to use Group Policy Editor can go to Computer Configuration/Administrative Templates/Windows Components/Microsoft Defender Antivirus/Scan and enable "Specify the scan type to use for a scheduled scan policy."
Similar:
What's the Best Antivirus and Is Windows Defender Good Enough
How to Manage Windows Defender Antivirus Found Threats
How to Change Windows Defender Max CPU Usage
How to Enable Possibly Unwanted Applications Protection With Windows Defender
Hide the Windows Defender Security Center Icon on the Windows 10 Taskbar
Download May Be Dangerous, so Chrome Has Blocked It
comments powered by Disqus
One option that we can change, but isn't readily available like most antivirus programs, is the ability to change from the default Quick Scan to a Full Scan.
We can accomplish this by opening PowerShell as an Administrator.
Find out your current default scan mode by typing in:
Get-MpPreference |Select-Object ScanParameters.
1: Quick Scan
2: Full Scan
To change the default scan mode, type in Set-MpPreference -ScanParameters (1 or 2) using either 1 (Quick) or 2 (Full).
In the next screenshot, you can see all the steps mentioned above, in order.
PowerShell makes this easy enough for anyone to try.
Anyone who prefers to use Group Policy Editor can go to Computer Configuration/Administrative Templates/Windows Components/Microsoft Defender Antivirus/Scan and enable "Specify the scan type to use for a scheduled scan policy."
Similar:
What's the Best Antivirus and Is Windows Defender Good Enough
How to Manage Windows Defender Antivirus Found Threats
How to Change Windows Defender Max CPU Usage
How to Enable Possibly Unwanted Applications Protection With Windows Defender
Hide the Windows Defender Security Center Icon on the Windows 10 Taskbar
Download May Be Dangerous, so Chrome Has Blocked It
comments powered by Disqus
