


How to Fix 'The Microsoft Store Needs to be Online' Error
By Timothy Tibbetts |
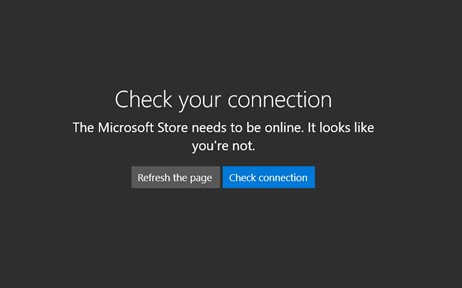
Some people have experienced an error connecting to the Microsoft Store that says "The Microsoft Store Needs to be Online. It looks like you're not" even when you know you are online. Here are the steps we know of to repair this Windows Store error.
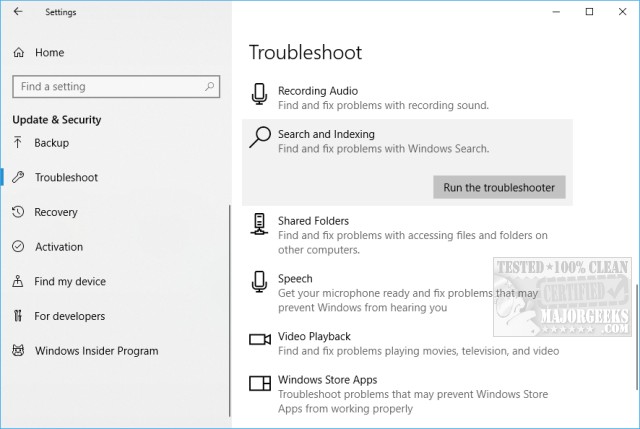
1: Try the Windows Store Apps Troubleshooter
While this troubleshooter is designed to fix broken apps, it could spot other problems accessing the store.
To get to the Troubleshooters, go to your Control Panel, Updates & Security, and look for Troubleshoot on the left. Windows Store Apps is at the bottom.
2: Check for a Registry Problem
Some privacy and security apps may have disabled the Windows Store in the registry. We wrote a guide on how to disable the Store, which is one of the ways most tweaking apps disable it, so reverse the steps in this guide or watch the video below.
Similar:
How to Restore Windows Store on Windows 10
How-To Disable the Windows Store on Windows 10 (Video)
Solved: Windows Store Does Not Open - Missing PurgeCaches
Windows Store Cache May Be Damaged
3: Run WSReset.exe
Press the Windows key + X and choose Windows PowerShell (Admin). Right click on that and Run as administrator. Type in wsreset.exe. and press enter.
4: Run Microsoft System File Checker
Microsoft System File Checker is a useful, built-in utility that can scan for, and restore, corrupted files in Windows.
Windows 10, Windows 8.1 or Windows 8 users will need to first run the Deployment Image Servicing and Management (DISM) tool before running the System File Checker. DISM will use Windows Update to provide any files that are needed to fix corruptions. If you skip this step, System File Checker might not work. Windows 7 and Vista users can skip this step.
You will need to first open the Command Prompt or PowerShell as administrator.
Type in DISM.exe /Online /Cleanup-image /Restorehealth and press enter. This may take a few minutes.
Next type in sfc /scannow followed by enter.
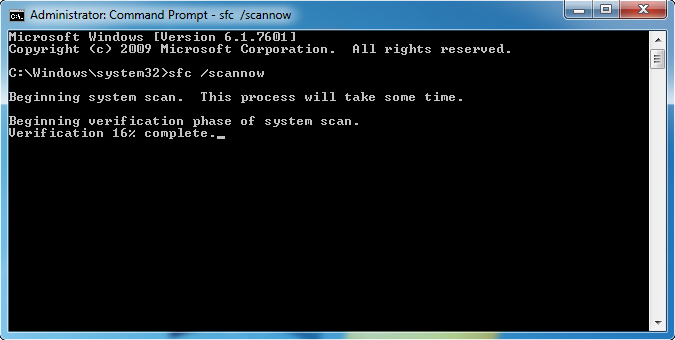
System File Checker will now scan for and replace files from the Windows cache, typically located at C:WindowsSystem32dllcache.
5: Verify Proxy Settings
Press the Windows Key + R, type in inetcpl.cpl and press Enter.
Click on the Connections tab, then Local Area Network (LAN) settings.
Automatically detect settings should be checked and Use a proxy server should be unchecked for most people. You can swap these settings and see if that solves the problem but be sure to change the settings back if not.
6: Check the HOSTS File
Your HOSTS file could have been modified by privacy or security apps as well as malware, ransomware, or a virus infection. Open your HOSTS file (C:WindowsSystem32driversetc) with Notepad and it should be identical to this:
# Copyright (c) 1993-2009 Microsoft Corp.
#
# This is a sample HOSTS file used by Microsoft TCP/IP for Windows.
#
# This file contains the mappings of IP addresses to host names. Each
# entry should be kept on an individual line. The IP address should
# be placed in the first column followed by the corresponding host name.
# The IP address and the host name should be separated by at least one
# space.
#
# Additionally, comments (such as these) may be inserted on individual
# lines or following the machine name denoted by a '#' symbol.
#
# For example:
#
# 102.54.94.97 rhino.acme.com # source server
# 38.25.63.10 x.acme.com # x client host
# localhost name resolution is handled within DNS itself.
# 127.0.0.1 localhost
# ::1 localhost
A simple way to restore your HOSTS file is to run Tweaking.com - Repair Hosts File.
We also have the default HOSTS file available for download - HOSTS File for Windows.
You can import a new HOSTS file with Hosty.
That's it! Frankly, this is one of the longer How to's we've written due to the many possibilities. Don't be intimidated. Start at the top and take your time. Its' easier than it looks!
comments powered by Disqus
1: Try the Windows Store Apps Troubleshooter
While this troubleshooter is designed to fix broken apps, it could spot other problems accessing the store.
To get to the Troubleshooters, go to your Control Panel, Updates & Security, and look for Troubleshoot on the left. Windows Store Apps is at the bottom.
2: Check for a Registry Problem
Some privacy and security apps may have disabled the Windows Store in the registry. We wrote a guide on how to disable the Store, which is one of the ways most tweaking apps disable it, so reverse the steps in this guide or watch the video below.
Similar:
How to Restore Windows Store on Windows 10
How-To Disable the Windows Store on Windows 10 (Video)
Solved: Windows Store Does Not Open - Missing PurgeCaches
Windows Store Cache May Be Damaged
3: Run WSReset.exe
Press the Windows key + X and choose Windows PowerShell (Admin). Right click on that and Run as administrator. Type in wsreset.exe. and press enter.
4: Run Microsoft System File Checker
Microsoft System File Checker is a useful, built-in utility that can scan for, and restore, corrupted files in Windows.
Windows 10, Windows 8.1 or Windows 8 users will need to first run the Deployment Image Servicing and Management (DISM) tool before running the System File Checker. DISM will use Windows Update to provide any files that are needed to fix corruptions. If you skip this step, System File Checker might not work. Windows 7 and Vista users can skip this step.
You will need to first open the Command Prompt or PowerShell as administrator.
Type in DISM.exe /Online /Cleanup-image /Restorehealth and press enter. This may take a few minutes.
Next type in sfc /scannow followed by enter.
System File Checker will now scan for and replace files from the Windows cache, typically located at C:WindowsSystem32dllcache.
5: Verify Proxy Settings
Press the Windows Key + R, type in inetcpl.cpl and press Enter.
Click on the Connections tab, then Local Area Network (LAN) settings.
Automatically detect settings should be checked and Use a proxy server should be unchecked for most people. You can swap these settings and see if that solves the problem but be sure to change the settings back if not.
6: Check the HOSTS File
Your HOSTS file could have been modified by privacy or security apps as well as malware, ransomware, or a virus infection. Open your HOSTS file (C:WindowsSystem32driversetc) with Notepad and it should be identical to this:
# Copyright (c) 1993-2009 Microsoft Corp.
#
# This is a sample HOSTS file used by Microsoft TCP/IP for Windows.
#
# This file contains the mappings of IP addresses to host names. Each
# entry should be kept on an individual line. The IP address should
# be placed in the first column followed by the corresponding host name.
# The IP address and the host name should be separated by at least one
# space.
#
# Additionally, comments (such as these) may be inserted on individual
# lines or following the machine name denoted by a '#' symbol.
#
# For example:
#
# 102.54.94.97 rhino.acme.com # source server
# 38.25.63.10 x.acme.com # x client host
# localhost name resolution is handled within DNS itself.
# 127.0.0.1 localhost
# ::1 localhost
A simple way to restore your HOSTS file is to run Tweaking.com - Repair Hosts File.
We also have the default HOSTS file available for download - HOSTS File for Windows.
You can import a new HOSTS file with Hosty.
That's it! Frankly, this is one of the longer How to's we've written due to the many possibilities. Don't be intimidated. Start at the top and take your time. Its' easier than it looks!
comments powered by Disqus
