


How to Fix Windows 10 Stuck on Diagnosing your PC or Preparing Automatic Repair
By Timothy Tibbetts |
While Windows 10 automatic repairs have improved, there is a frustrating situation where the computer gets stuck while the screen displays Diagnosing your PC or Preparing Automatic Repair. Here are the steps you can take to solve this problem.
1: Hard Reboot
This situation calls for a hard reboot. Hold down your power button until the computer turns off. Remove the power cord or battery and put them back. Now hold the power button until you see the computer start.
Moving forward, each step will require a hard reboot except for the last step, followed by booting into Safe Mode.
2: Run System File Checker
Here is a video on running System File Checker and required DISM for Windows 8.1 and newer:
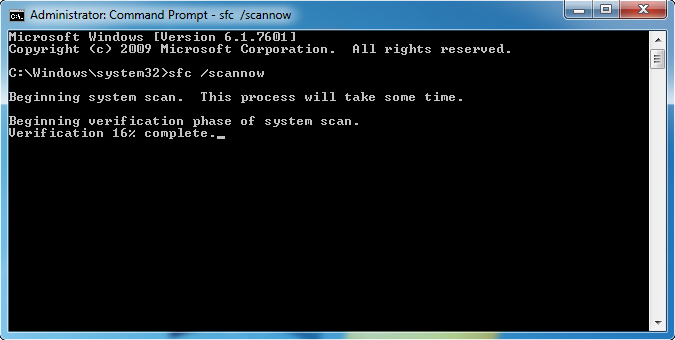
You will need to first open the Command Prompt or PowerShell as administrator.
Type in sfc /scannow and press the Enter key.
3: Run DISM (Deployment Image Servicing and Management)
Windows 10, Windows 8.1 or Windows 8 users will need to first run the Deployment Image Servicing and Management (DISM) tool before running the System File Checker. DISM will use Windows Update to provide any files that are needed to fix corruptions. If you skip this step, System File Checker might not work. Windows 7 and Vista users can skip this step.
Type the following three lines, one at a time:
DISM.exe /Online /Cleanup-image /Restorehealth
Dism /Online /Cleanup-Image /ScanHealth
Dism /Online /Cleanup-Image /RestoreHealth
Reboot when all steps are completed.
4: Run Check Disk
From Safe Mode, open a Command Prompt as admin (again) and type in chkdsk c: /f and reboot when completed.
5: Disable Automatic Repair
From Safe Mode, open a Command Prompt as admin (again) and type in bcdedit /set recoveryenabled no and reboot
6: Boot From Windows DVD
If you have a Windows DVD around, you can boot from the DVD and look for the Repair your computer link that appears at the same time as Install Now.
comments powered by Disqus
1: Hard Reboot
This situation calls for a hard reboot. Hold down your power button until the computer turns off. Remove the power cord or battery and put them back. Now hold the power button until you see the computer start.
Moving forward, each step will require a hard reboot except for the last step, followed by booting into Safe Mode.
2: Run System File Checker
Here is a video on running System File Checker and required DISM for Windows 8.1 and newer:
You will need to first open the Command Prompt or PowerShell as administrator.
Type in sfc /scannow and press the Enter key.
3: Run DISM (Deployment Image Servicing and Management)
Windows 10, Windows 8.1 or Windows 8 users will need to first run the Deployment Image Servicing and Management (DISM) tool before running the System File Checker. DISM will use Windows Update to provide any files that are needed to fix corruptions. If you skip this step, System File Checker might not work. Windows 7 and Vista users can skip this step.
Type the following three lines, one at a time:
DISM.exe /Online /Cleanup-image /Restorehealth
Dism /Online /Cleanup-Image /ScanHealth
Dism /Online /Cleanup-Image /RestoreHealth
Reboot when all steps are completed.
4: Run Check Disk
From Safe Mode, open a Command Prompt as admin (again) and type in chkdsk c: /f and reboot when completed.
5: Disable Automatic Repair
From Safe Mode, open a Command Prompt as admin (again) and type in bcdedit /set recoveryenabled no and reboot
6: Boot From Windows DVD
If you have a Windows DVD around, you can boot from the DVD and look for the Repair your computer link that appears at the same time as Install Now.
comments powered by Disqus
