


How to Restore Default Font Settings in Windows
By Timothy Tibbetts |
In this tutorial, we show you how to restore the default font settings in Windows 10, 8, and 7.
1: Restore Default Font Settings in File or Windows Explorer
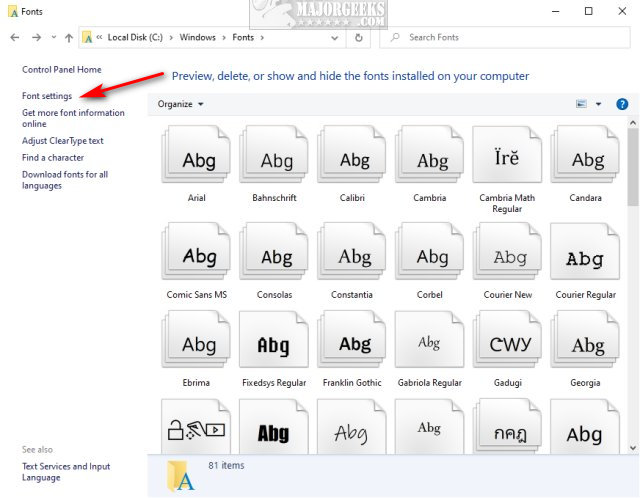
Open File or Windows Explorer and go to C:\Windows\Fonts.
Click on Font settings.
Click on Restore default font settings.
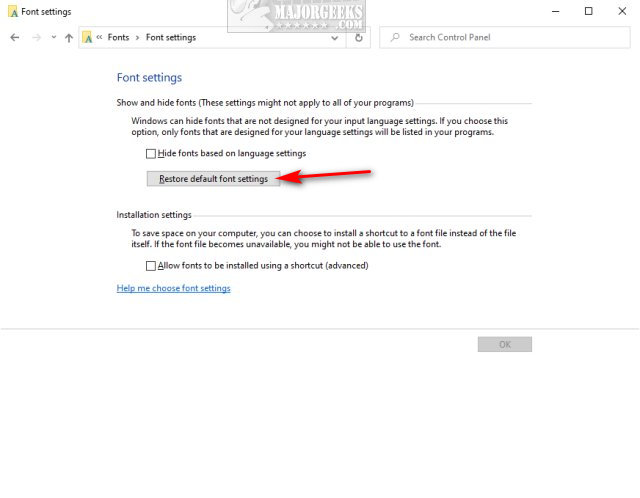
Optionally, you can click on Hide fonts based on language settings.
Click OK or close the window.
2: Restore Default Font Settings With a Registry File
Download RestoreDefault Font Settings in Windows, and extract Restore Default Font Settings.reg.
Double-click Restore Default Font Settings.reg to restore default font settings.
Click Yes when prompted by User Account Control.
Click Yes when prompted by Registry Editor.
Click OK when prompted by the Registry Editor.
This tweak is included as part of MajorGeeks Registry Tweaks.
Similar:
How to Install or Uninstall Fonts in Windows
How to Customize Fonts, Colors, Window Size and More With PowerShell or Command Prompt
1: Restore Default Font Settings in File or Windows Explorer
Open File or Windows Explorer and go to C:\Windows\Fonts.
Click on Font settings.
Click on Restore default font settings.
Optionally, you can click on Hide fonts based on language settings.
Click OK or close the window.
2: Restore Default Font Settings With a Registry File
Download RestoreDefault Font Settings in Windows, and extract Restore Default Font Settings.reg.
Double-click Restore Default Font Settings.reg to restore default font settings.
Click Yes when prompted by User Account Control.
Click Yes when prompted by Registry Editor.
Click OK when prompted by the Registry Editor.
This tweak is included as part of MajorGeeks Registry Tweaks.
Similar:
