


How to Restore or Reset Default Windows Defender Firewall Settings in Windows 10 & 11
By Timothy Tibbetts |
If you need to restore or reset your Windows Firewall settings in Windows 10 & 11, here are a few ways to do so.
We can restore or reset your Windows Firewall settings in Windows Security, Classic Control Panel, or even from the Command Prompt.
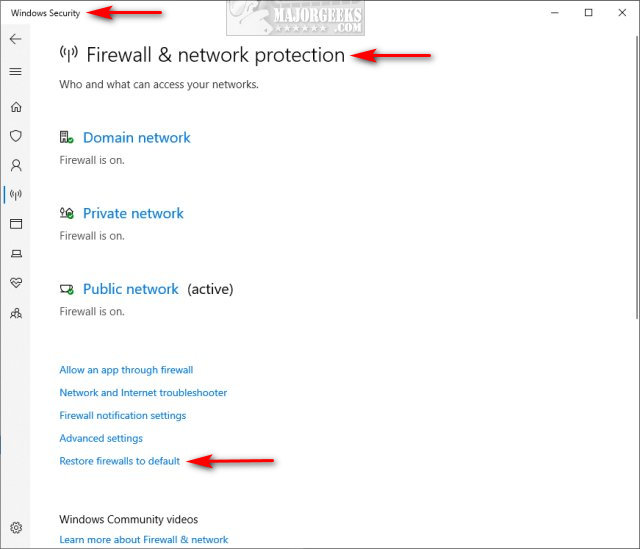
1: Restore or Reset Default Windows Defender Firewall Settings in Windows Security
Windows 10 users can open Windows Security.
Click the Windows Security icon in the system tray. Click on Firewall & network protection.
Scroll down, find, and click on Restore firewalls to default.
2: Restore or Reset Default Windows Defender Firewall Settings in Control Panel
Windows 7-10 users can use the classic Control Panel.
Open the classic Control Panel (not Settings).
Click on Windows Defender Firewall.
Click on Restore defaults.
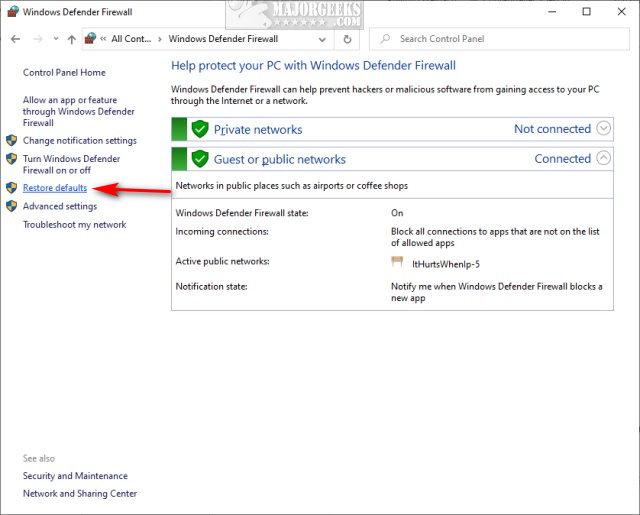
Click on Restore defaults a second time.
Click Yes to confirm.
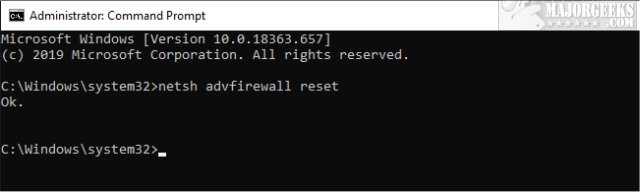
3: Restore or Reset Default Windows Defender Firewall Settings in Powershell or Command Prompt
If you can't access your firewall settings, using the Command Prompt is simple. Windows 10 users should use PowerShell, and everyone can use the Command Prompt.
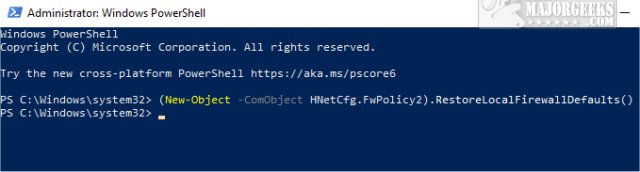
Open PowerShell or the Command Prompt, and type in the following line and press Enter. The Command Prompt should return OK, while PowerShell will return nothing, as shown below.
Command Prompt - netsh advfirewall reset
PowerShell - (New-Object -ComObject HNetCfg.FwPolicy2).RestoreLocalFirewallDefaults()
comments powered by Disqus
We can restore or reset your Windows Firewall settings in Windows Security, Classic Control Panel, or even from the Command Prompt.
1: Restore or Reset Default Windows Defender Firewall Settings in Windows Security
Windows 10 users can open Windows Security.
Click the Windows Security icon in the system tray. Click on Firewall & network protection.
Scroll down, find, and click on Restore firewalls to default.
2: Restore or Reset Default Windows Defender Firewall Settings in Control Panel
Windows 7-10 users can use the classic Control Panel.
Open the classic Control Panel (not Settings).
Click on Windows Defender Firewall.
Click on Restore defaults.
Click on Restore defaults a second time.
Click Yes to confirm.
3: Restore or Reset Default Windows Defender Firewall Settings in Powershell or Command Prompt
If you can't access your firewall settings, using the Command Prompt is simple. Windows 10 users should use PowerShell, and everyone can use the Command Prompt.
Open PowerShell or the Command Prompt, and type in the following line and press Enter. The Command Prompt should return OK, while PowerShell will return nothing, as shown below.
Command Prompt - netsh advfirewall reset
PowerShell - (New-Object -ComObject HNetCfg.FwPolicy2).RestoreLocalFirewallDefaults()
comments powered by Disqus
