


How to Turn On or Off Connect Automatically to Wireless Network
By Timothy Tibbetts |
Windows 10 gives you the option to connect to a wireless network automatically. In this tutorial, we look at how to turn on or off Connect automatically.
Turn On or Off Connect Automatically in System Tray
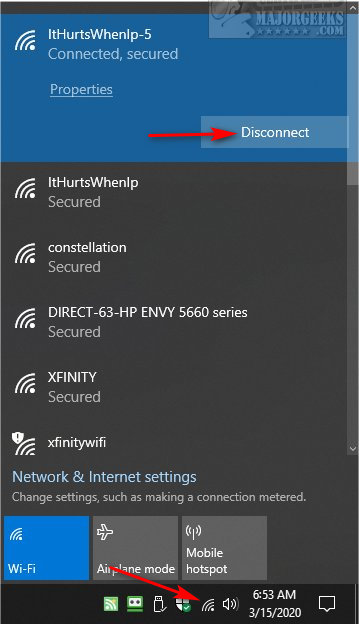
The easiest way is to click on the Wi-Fi icon in the System Tray.
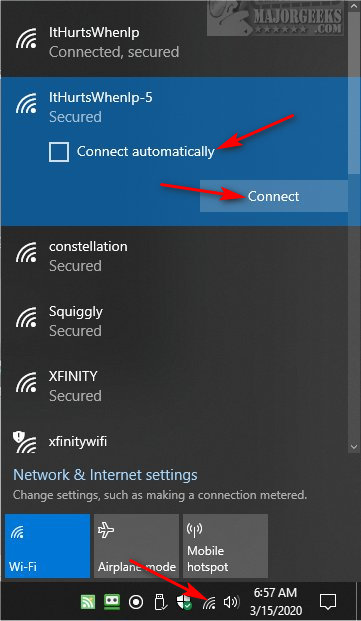
Here you can disconnect or connect. When connecting, the option Connect automatically is available.
Disconnect from a wireless network and reconnect to change the option.
Turn On or Off Connect Automatically in Settings
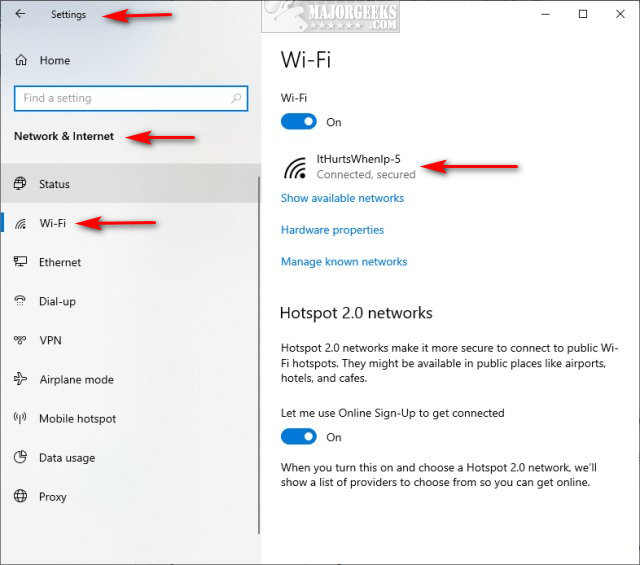
Click on Start > Settings > Network & Internet
Click on Wi-Fi.
Click on your wireless connection.
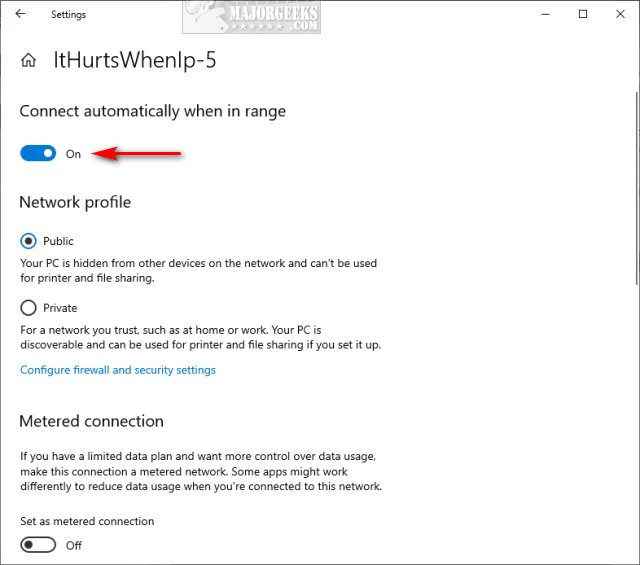
Check or uncheck Connect automatically when in range.
Turn On or Off Connect Automatically in Control Panel
Open Control Panel.
Click on Network and Sharing Center.
Click on your Wi-Fi connection and click on Wireless Properties.
Check or uncheck Connect automatically when this network is in range.
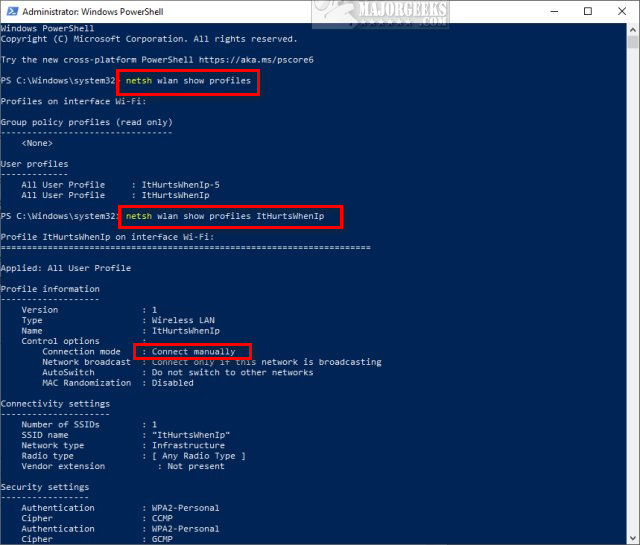
Turn On or Off Connect Automatically In Command Prompt
Open PowerShell or the Command Prompt. Replace any 'YourWirelessName' below with your Wi-Fi name.
Find your router name with netsh wlan show profiles
Find your status with netsh wlan show profile 'YourWirelessName'
Turn on - netsh wlan set profileparameter name='YourWirelessName' connectionmode=auto
Turn off - netsh wlan set profileparameter name='YourWirelessName' connectionmode=manual
Similar:
How to View Wireless Network Signal Strength in Windows 10
How to Hide Nearby Wi-Fi Connections From Your List of Networks
How to Change Preferred Band (2.4 GHz or 5 GHz) for Wireless Network Adapters
5GHz Wi-Fi Not Showing up in Windows
How to Enable or Disable IPv6 in Windows
3 Ways to Delete a Wireless Network Profile in Windows 10
comments powered by Disqus
Turn On or Off Connect Automatically in System Tray
The easiest way is to click on the Wi-Fi icon in the System Tray.
Here you can disconnect or connect. When connecting, the option Connect automatically is available.
Disconnect from a wireless network and reconnect to change the option.
Turn On or Off Connect Automatically in Settings
Click on Start > Settings > Network & Internet
Click on Wi-Fi.
Click on your wireless connection.
Check or uncheck Connect automatically when in range.
Turn On or Off Connect Automatically in Control Panel
Open Control Panel.
Click on Network and Sharing Center.
Click on your Wi-Fi connection and click on Wireless Properties.
Check or uncheck Connect automatically when this network is in range.
Turn On or Off Connect Automatically In Command Prompt
Open PowerShell or the Command Prompt. Replace any 'YourWirelessName' below with your Wi-Fi name.
Find your router name with netsh wlan show profiles
Find your status with netsh wlan show profile 'YourWirelessName'
Turn on - netsh wlan set profileparameter name='YourWirelessName' connectionmode=auto
Turn off - netsh wlan set profileparameter name='YourWirelessName' connectionmode=manual
Similar:
How to View Wireless Network Signal Strength in Windows 10
How to Hide Nearby Wi-Fi Connections From Your List of Networks
How to Change Preferred Band (2.4 GHz or 5 GHz) for Wireless Network Adapters
5GHz Wi-Fi Not Showing up in Windows
How to Enable or Disable IPv6 in Windows
3 Ways to Delete a Wireless Network Profile in Windows 10
comments powered by Disqus
