


How to Change Mouse Sensitivity (Pointer Speed) in Windows 10 & 11
By Timothy Tibbetts |
Having the right mouse sensitivity can make using Windows a much more pleasant experience. Here's how to change your mouse sensitivity in Windows 10 or 11.
Video tutorial:
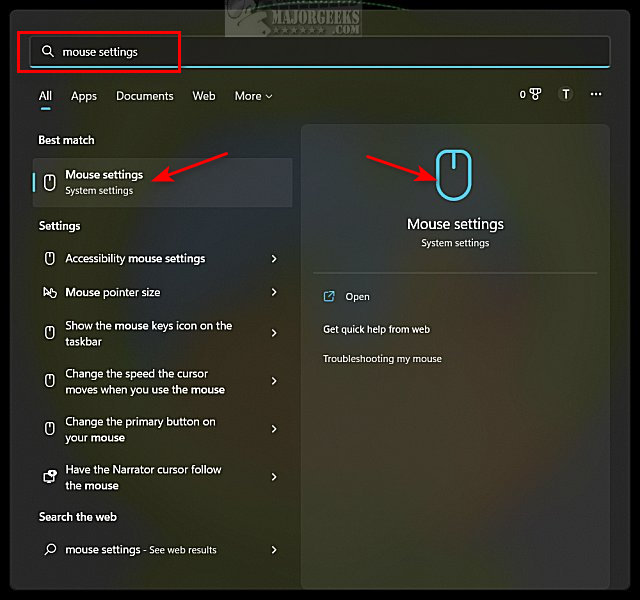
Press the Windows Key + S, type in and click on Mouse settings.
Under Mouse pointer speed, adjust the slider left (slower) or right (faster) to achieve the speed you desire.
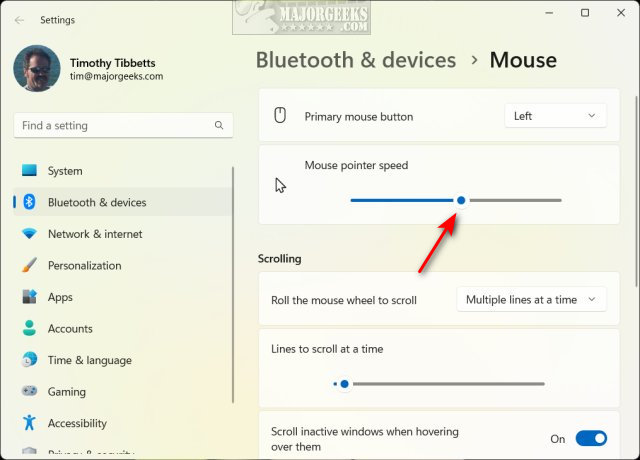
The mouse sensitivity, or pointer speed, is set to the middle by default.
Each time you slide the bar, you can stop and test the speed as the changes are immediate. We like to use the slowest setting, followed by the fastest setting, so you can see the extreme difference between the two, hopefully allowing you to find that sweet spot for your needs.
Similar:
How to Enable or Disable Mouse Acceleration in Windows 10 & 11
How to Hide the Mouse Cursor When Typing in Windows 10 & 11
How to Change Your Mouse Pointer Size, Style, and Color in Windows 11
How to Enable Mouse Pointer Trails
How to Troubleshoot a Mouse That's Slow, Lagging or Jumpy
Press the Windows Key + S, type in and click on Mouse settings.
Under Mouse pointer speed, adjust the slider left (slower) or right (faster) to achieve the speed you desire.
The mouse sensitivity, or pointer speed, is set to the middle by default.
Each time you slide the bar, you can stop and test the speed as the changes are immediate. We like to use the slowest setting, followed by the fastest setting, so you can see the extreme difference between the two, hopefully allowing you to find that sweet spot for your needs.
Similar:
