


There Was a Problem Starting C:\Windows\System32\LogiLDA.dll Error
By Timothy Tibbetts |
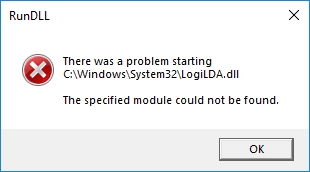
If you receive an error stating, "There was a problem starting C:\Windows\System32\LogiLDA.dll." You might also be told that "The specified module could not be found." The problem is with your Logitech software. The error is known to appear after a Windows Update. Follow these steps to resolve this error.
1: Remove or Reinstall Logitech Software
Many guides referring to this issue recommend that you disable Logitech from Startup or copy the DLL file from C:\Windows.old\WINDOWS\System32. If that's an option, copying the file works, and disabling Logitech from Startup is a bandaid.
Instead, we'd uninstall the Logitech software if you don't use it and reinstall it if you do.
Download IOBit Uninstaller or Geek Uninstaller to be sure you completely uninstall the Logitech software.
Visit the Logitech Support website and download the new software you need.
2: Restore Logilda.dll
You might be able to find Logilda.Dll in C:\Windows.old\WINDOWS\System32 if you just updated Windows 10.
If so, copy logilda.dll to C:\Windows\System32 using PowerShell as Admin. You may also be able to copy the file in File Explorer in Safe Mode.
3: Disable Logitech Download Assistant From Startup
We want to disable the Logitech Download Assistant in Startup. Some people are finding it in different places. Here are the four different places to try:
1: Press the Windows Key + S and type in Startup and click on Startup Apps. You can also find Startup Apps in Settings > Apps > Startup.
Find Logitech Download Assistant and check the box Off.
2: Press CTRL + ALT + Delete and click Task Manager. Click on the Startup tab. Right-click on LogiDA and select Disable.
3: Open the Registry Editor and navigate to HKEY_LOCAL_MACHINE\Software\Microsoft\Windows\CurrentVersion\Run. Delete the Logitech Download Assistant key.
4: You can also use any third-party startup manager to disable the Logitech Download Assistant if this method fails for any reason. CCleaner includes a startup manager, for example. Microsoft Autoruns is another free option.
