

· How To and Tutorials
· Life Hacks and Reviews
· Way Off Base
· MajorGeeks Deals
· News
· Off Base
· Reviews
· Life Hacks and Reviews
· Way Off Base
· MajorGeeks Deals
· News
· Off Base
· Reviews

· YouTube
· Facebook
· Instagram
· Twitter
· Pintrest
· RSS/XML Feeds
· News Blur
· Yahoo
· Symbaloo
· Pintrest
· RSS/XML Feeds
· News Blur
· Yahoo
· Symbaloo
· Top Freeware Picks
· Malware Removal
· Geektionary
· Useful Links
· About Us
· Copyright
· Privacy
· Terms of Service
· How to Uninstall
· Malware Removal
· Geektionary
· Useful Links
· About Us
· Copyright
· Privacy
· Terms of Service
· How to Uninstall


· View Essential System Details with myResources
· Control When Windows 10 Updates with Kill-Update
· How to Fix There Was a Problem Resetting Your PC Error on Windows 10
· How to Turn on or off Recommended Troubleshooting in Windows 10
· MajorGeeks Deals Page
· test jim
· How to Set a New Home / Start Page In Edge
· How To Remove the Bing Discover Button on Microsoft Edge for Windows, Mac and Linux
· How to Block Spam Calls on a Samsung Phone
· How to Change DPI Scaling Settings in Windows 10 or 11
· How to Install Threads on Your Windows Desktop
· MajorGeeks and Cheat Happens August 2023 Give-A-Way
· Here's What You Need to Know About LogoFAIL
· Using AeroShake To Clear Your Desktop
· How to Edit Audio in Your Videos Using Shotcut
· How to Diagnose RAM Issues with Windows Memory Diagnostic Tool: A Step-by-Step Guide
· Deciding Between Idle State, Sleep Mode, and Shutdown: What's Best for Your PC?
· Unlock Google's Hidden Powers: Search Tricks Every Geek Should Know
· 2024 Black Friday Deals
· TikTok Ban: What Happens If the Supreme Court Upholds It?
This PC Can't Run Windows 11
Following the announcement of Windows 11, many people were surprised to find out that Windows PC Health Check told them their computer couldn't run Windows 11. For most, this is easily explained.
Update: Microsoft has acknowledged that their Windows PC Health check needs work. See Step 4 for other ways to test your computer.
Video tutorial:
Windows 11 has fairly light system requirements. Because it is based on Windows 10, one might assume that their Windows 10 computer can run Windows 11. But, just in case, let's make sure that your computer can, starting with the official system requirements and possible troubleshooting regarding Secure Boot and TPM 2.0.
1 GHz processor with 2 cores
4 GB of RAM
64 GB hard drive
DirectX 12 video card
9" Display with HD
Microsoft account and internet
A Secure Boot capable UEFI or Unified Extensible Firmware Interface (Some would refer to this as your BIOS, as we will occasionally)
Trusted Platform Module (TPM) version 2.0
The final two requirements are why most people are getting a This PC Can't Run Windows 11 error.

Secure Boot and TPM must be enabled in your UEFI to run Windows 11. Let's find out following these steps, intentionally done from easy to hard.
1: Does your UEFI support Secure Boot and TPM? Every BIOS is different, so this is where you might consider searching for your motherboard or computer brand and model to find out if both Secure Boot and TPM 2.0 are features on your motherboard. Most modern motherboards support both. You might also consider updating your BIOS.
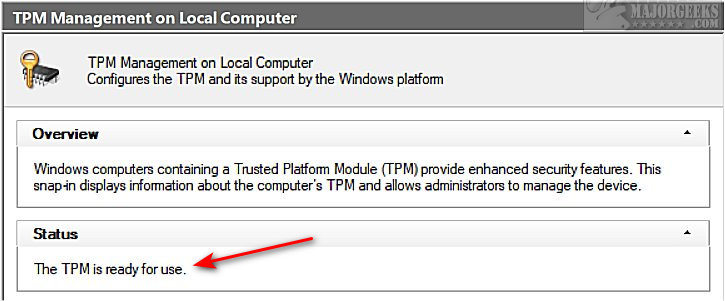
2: Press the Windows key + r, type in tpm.msc, and press Enter. If you're lucky, TPM is available and enabled.
3: Next, we need to check your UEFI (BIOS) settings for Secure Boot and TPM. Once again, there are thousands of configurations, so we can't be sure where your settings are, but we can point you in the right direction. It would be best if you were careful when making any changes in the BIOS. It's not for amateurs. Everything in the UEFI (BIOS) determines how Windows sees your configuration. It's a pretty big deal. You can safely look through UEFI settings and exit without saving. Making changes should be done with caution.
Reboot your computer and watch the screen for what key to press to enter the BIOS setup. You usually have to press the Delete or one of the function keys.
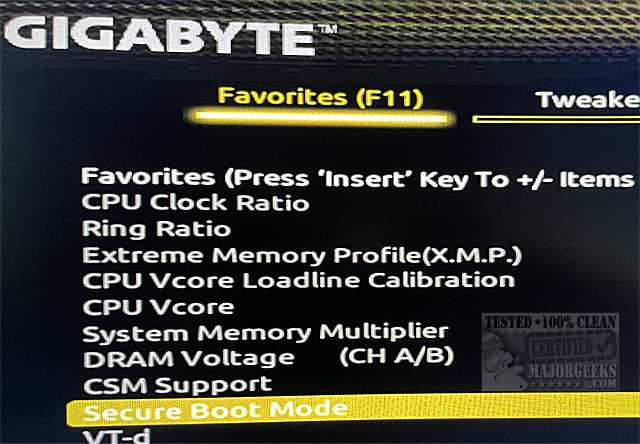
Once in the BIOS, you'll need to look for Secure Boot and TPM and enable them. Look near the bottom for keyboard options to navigate. Often, this is as simple as using your arrow keys to move and Enter to select.
We were lucky and found Secure Boot in our Favorites section, although most motherboards don't have a favorites category. You might be looking for a Boot category.
If TPM were not enabled in Step 1, you'd have to look for that as well. It took us a while to find ours in the Settings category.
Adding to the confusion was Intel named their TPM Intel Platform Trust Technology (PTT).
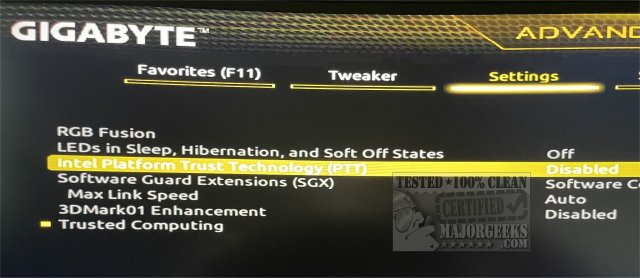
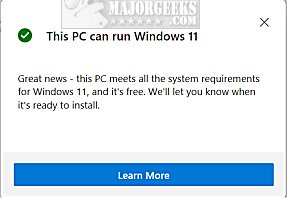
As an experienced geek, I was pretty sure that was the setting I needed, but it was a little awkward seeing it named differently. I looked at it for a few minutes, thinking that had to be it, but again, when playing in your BIOS, you want to be careful. We were able to press Enter, then click on Enabled, and lo and behold, suddenly, my computer could run Windows 11.
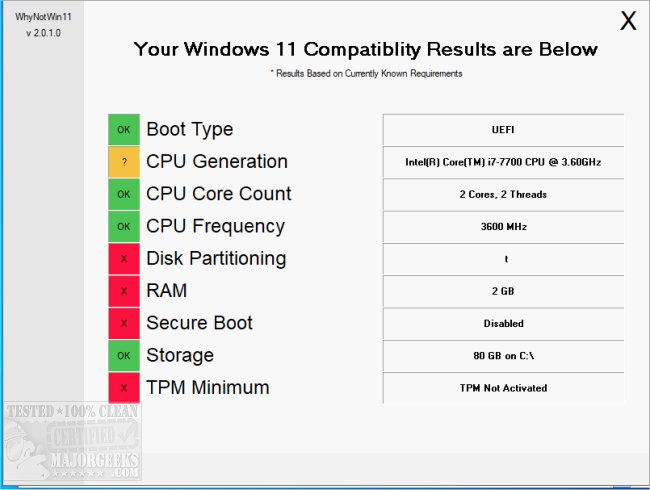
4: If you're unsure what the problem is, try WhyNotWin11 to find out the exact cause of your problem.
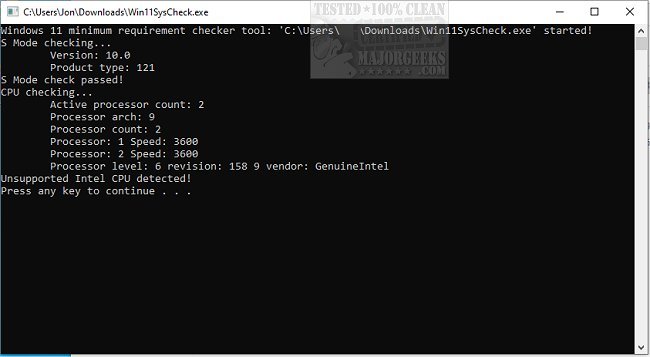
A second app has been released called Win11SysCheck. It's a simple command-line, freeware app.
5: If your computer can't run Windows 11, we found that Windows 11 will install in VMware even with Secure Boot and TPM turned off. So, if you must play with Windows 11, try out the free VMWare Player.
Otherwise, please take a look at our video where we take a brief look at the early, leaked build of Windows 11.
Similar:
Windows 11 First Look
Why Windows 10 Isn't the Last Version of Windows
Get Windows 11 Sounds Now
Get Windows 11 Wallpapers Now
Get Microsoft Windows PC Health Check Now
This PC Can't Run Windows 11
comments powered by Disqus
Update: Microsoft has acknowledged that their Windows PC Health check needs work. See Step 4 for other ways to test your computer.
Windows 11 has fairly light system requirements. Because it is based on Windows 10, one might assume that their Windows 10 computer can run Windows 11. But, just in case, let's make sure that your computer can, starting with the official system requirements and possible troubleshooting regarding Secure Boot and TPM 2.0.
The final two requirements are why most people are getting a This PC Can't Run Windows 11 error.
Secure Boot and TPM must be enabled in your UEFI to run Windows 11. Let's find out following these steps, intentionally done from easy to hard.
1: Does your UEFI support Secure Boot and TPM? Every BIOS is different, so this is where you might consider searching for your motherboard or computer brand and model to find out if both Secure Boot and TPM 2.0 are features on your motherboard. Most modern motherboards support both. You might also consider updating your BIOS.
2: Press the Windows key + r, type in tpm.msc, and press Enter. If you're lucky, TPM is available and enabled.
3: Next, we need to check your UEFI (BIOS) settings for Secure Boot and TPM. Once again, there are thousands of configurations, so we can't be sure where your settings are, but we can point you in the right direction. It would be best if you were careful when making any changes in the BIOS. It's not for amateurs. Everything in the UEFI (BIOS) determines how Windows sees your configuration. It's a pretty big deal. You can safely look through UEFI settings and exit without saving. Making changes should be done with caution.
Reboot your computer and watch the screen for what key to press to enter the BIOS setup. You usually have to press the Delete or one of the function keys.
Once in the BIOS, you'll need to look for Secure Boot and TPM and enable them. Look near the bottom for keyboard options to navigate. Often, this is as simple as using your arrow keys to move and Enter to select.
We were lucky and found Secure Boot in our Favorites section, although most motherboards don't have a favorites category. You might be looking for a Boot category.
If TPM were not enabled in Step 1, you'd have to look for that as well. It took us a while to find ours in the Settings category.
Adding to the confusion was Intel named their TPM Intel Platform Trust Technology (PTT).
As an experienced geek, I was pretty sure that was the setting I needed, but it was a little awkward seeing it named differently. I looked at it for a few minutes, thinking that had to be it, but again, when playing in your BIOS, you want to be careful. We were able to press Enter, then click on Enabled, and lo and behold, suddenly, my computer could run Windows 11.
4: If you're unsure what the problem is, try WhyNotWin11 to find out the exact cause of your problem.
A second app has been released called Win11SysCheck. It's a simple command-line, freeware app.
5: If your computer can't run Windows 11, we found that Windows 11 will install in VMware even with Secure Boot and TPM turned off. So, if you must play with Windows 11, try out the free VMWare Player.
Otherwise, please take a look at our video where we take a brief look at the early, leaked build of Windows 11.
Similar:
comments powered by Disqus
