


Windows Could Not Connect to the System Event Notification Service
By Timothy Tibbetts |
Windows could not connect to the System Event Notification Service is an error that can appear when you get to the Windows login screen or in the system tray notification area. Here are the known steps to get rid of this error.
Before You Begin
If you are unable to get past the login screen, reboot into Safe Mode.
You should also check Windows Updates because we've seen this bug appear and be addressed in Windows Updates.
Some people recommend updating your drivers. While we're skeptical, that's usually a good idea.
1: Check Services
There's a possibility that one of the required services has been disabled.
Press the Windows Key + R and type in services.msc.
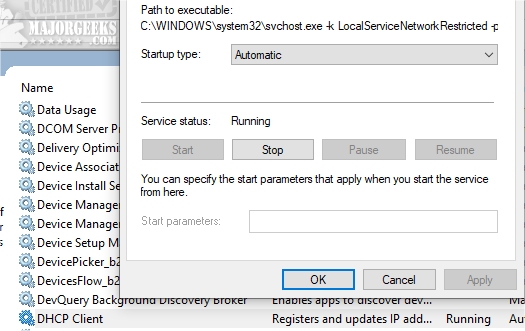
Locate three Services.
DHCP Client
System Event Notification Service
Windows Font Cache Service
Each service should be Running under Status. If not, double-click and change the Service to Automatic. Finally, click Start.
2: Reset Winsock
Creating a Restore Point is always a good idea before proceeding.
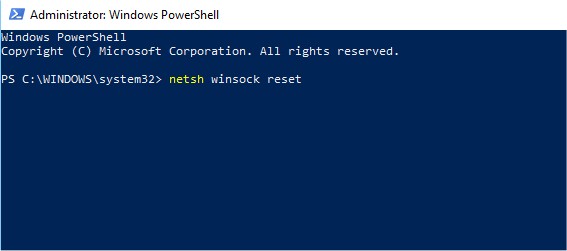
Start by opening Command Prompt or PowerShell as admin.
Type in the following three lines one at a time so we can cover all bases:
netsh winsock reset
IPv4: netsh int ipv4 reset
IPv6: type netsh int ipv6 reset
3: Run System File Checker
Microsoft System File Checker is a useful, built-in utility that can scan for, and restore, corrupted files in Windows. It is often used and recommended by techs and advanced users, however, it's relatively simple to use.
1: Getting Started
Windows 10, Windows 8.1 or Windows 8 users will need to first run the Deployment Image Servicing and Management (DISM) tool before running the System File Checker. DISM will use Windows Update to provide any files that are needed to fix corruptions. If you skip this step, System File Checker might not work. Windows 7 and Vista users can skip this step.
You will need to first open the Command Prompt or PowerShell as administrator.
Type in DISM.exe /Online /Cleanup-image /Restorehealth and press enter. This may take a few minutes.
2: Running System File Checker
All you need to do is type in sfc /scannow and press the Enter key.
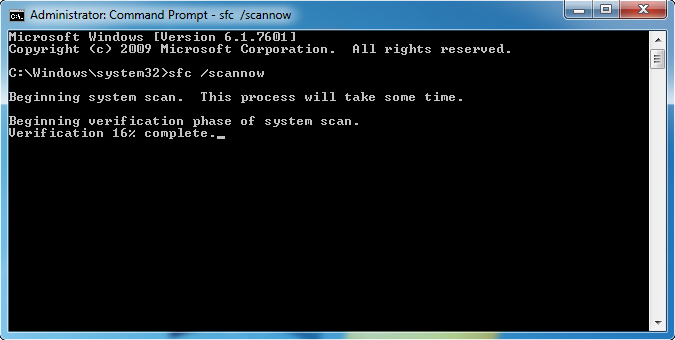
System File Checker will now scan for and replace files from the Windows cache, typically located at C:\Windows\System32\dllcache.
A reboot will be required, and you're done.
Similar:
Turn Windows Defender Security Center Notifications on or off (Video)
Disable Some or All Notifications on Windows 10
How to Change the Windows 10 Notification Display Time
How To Disable or Enable Notifications on Windows 10
Notifications Missing From Action Center
How to Restore Missing Action Center Notifications
How to Delete Old Notifications in Action Center on Windows 10
How to Change, Add, or Remove Windows 10 Notification Sounds
Before You Begin
If you are unable to get past the login screen, reboot into Safe Mode.
You should also check Windows Updates because we've seen this bug appear and be addressed in Windows Updates.
Some people recommend updating your drivers. While we're skeptical, that's usually a good idea.
1: Check Services
There's a possibility that one of the required services has been disabled.
Press the Windows Key + R and type in services.msc.
Locate three Services.
DHCP Client
System Event Notification Service
Windows Font Cache Service
Each service should be Running under Status. If not, double-click and change the Service to Automatic. Finally, click Start.
2: Reset Winsock
Creating a Restore Point is always a good idea before proceeding.
Start by opening Command Prompt or PowerShell as admin.
Type in the following three lines one at a time so we can cover all bases:
netsh winsock reset
IPv4: netsh int ipv4 reset
IPv6: type netsh int ipv6 reset
3: Run System File Checker
Microsoft System File Checker is a useful, built-in utility that can scan for, and restore, corrupted files in Windows. It is often used and recommended by techs and advanced users, however, it's relatively simple to use.
1: Getting Started
Windows 10, Windows 8.1 or Windows 8 users will need to first run the Deployment Image Servicing and Management (DISM) tool before running the System File Checker. DISM will use Windows Update to provide any files that are needed to fix corruptions. If you skip this step, System File Checker might not work. Windows 7 and Vista users can skip this step.
You will need to first open the Command Prompt or PowerShell as administrator.
Type in DISM.exe /Online /Cleanup-image /Restorehealth and press enter. This may take a few minutes.
2: Running System File Checker
All you need to do is type in sfc /scannow and press the Enter key.
System File Checker will now scan for and replace files from the Windows cache, typically located at C:\Windows\System32\dllcache.
A reboot will be required, and you're done.
Similar:
